Burning Man Raptor Project
A wearable articulated PVC creature on a pack frame, built for the playa
What it is
I built a wearable articulated raptor from PVC pipe, rope bracing, and cable linkages on a backpack frame, with me inside making it walk. Moving neck, head, jaw, legs, and a counterbalanced tail.
It’s done. As of August 22 the whole creature is clad, painted, and lit: flame-striped body plates, a full set of teeth, and a pair of LED eyes that blink. The color is “pornj” (fluorescent pink plus fluorescent orange), because I’m camping with Disorient and also I love orange and pink.
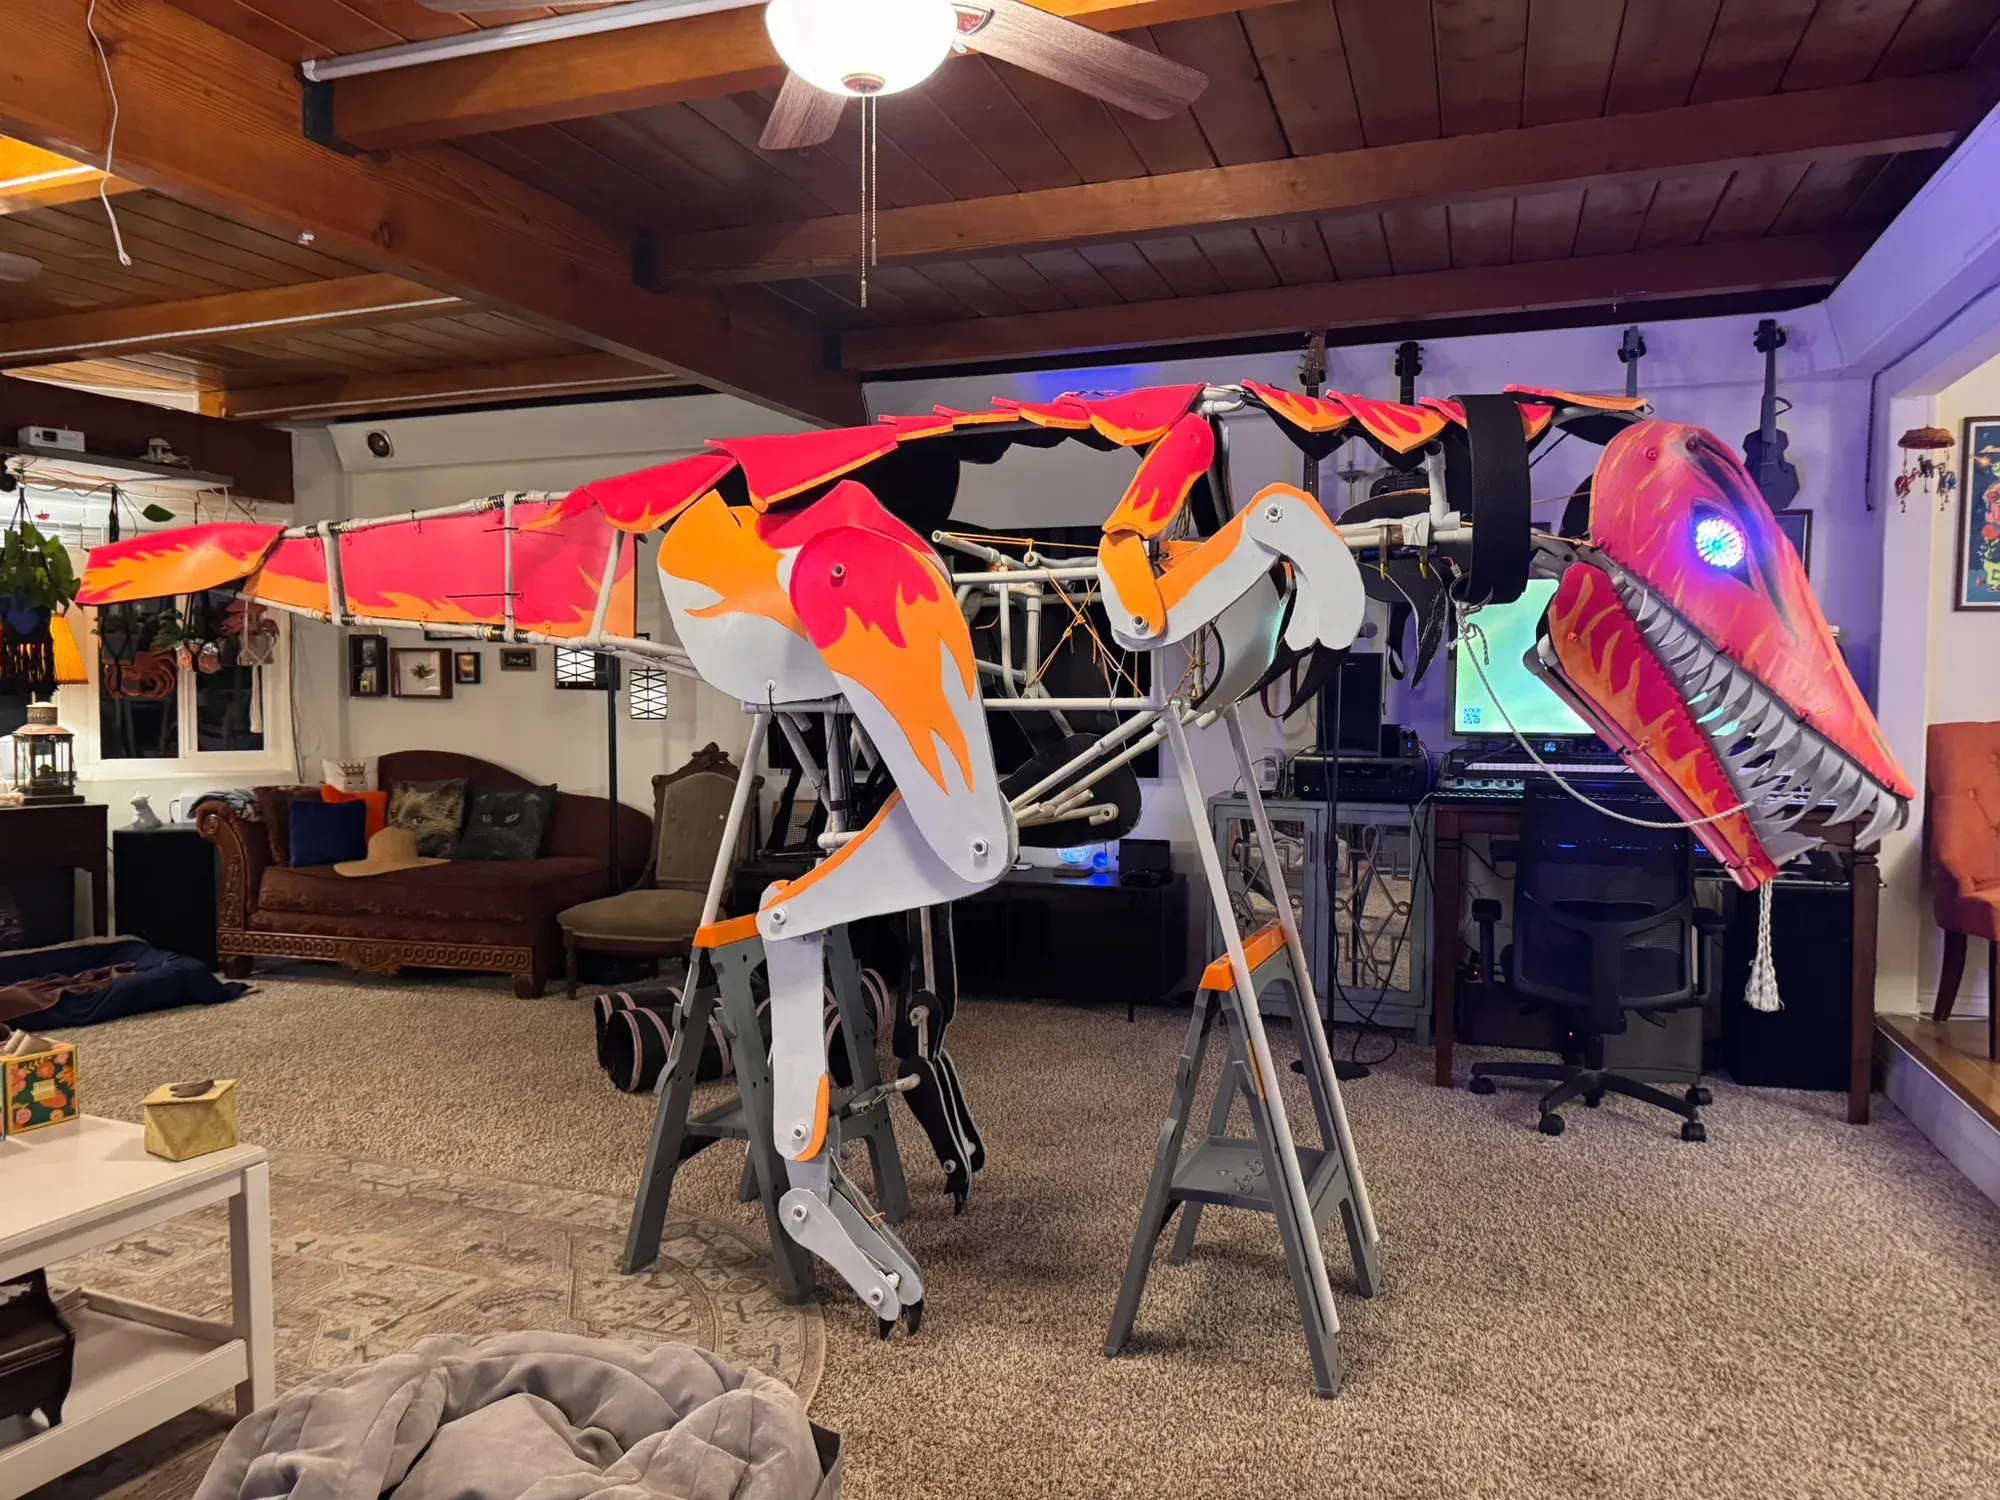
The name: still TBD. What’s Latin for “I made the head too big”?
Where it came from
Years ago I saw a video of Esmee Kramer’s Project Raptor: a giant walking raptor costume built from heat-formed PVC pipe, rope-braced trusses, and a seesaw spine on a backpack frame, with a bowden cable running the jaw. It has lived rent-free in my head ever since. Her build and this other dinosaur costume that either inspired or is derived from it both leave out the measurements and linkage closeups you’d need to easily make your own, so I held off starting this project until some friends talked me into going to Burning Man this year (they really didn’t need to do that much talking lol).
This project comes with a standing promise: I will publish everything so nobody else needs to feel the pain of pausing a youtube video and measuring the screen with calipers.
Software first, obviously
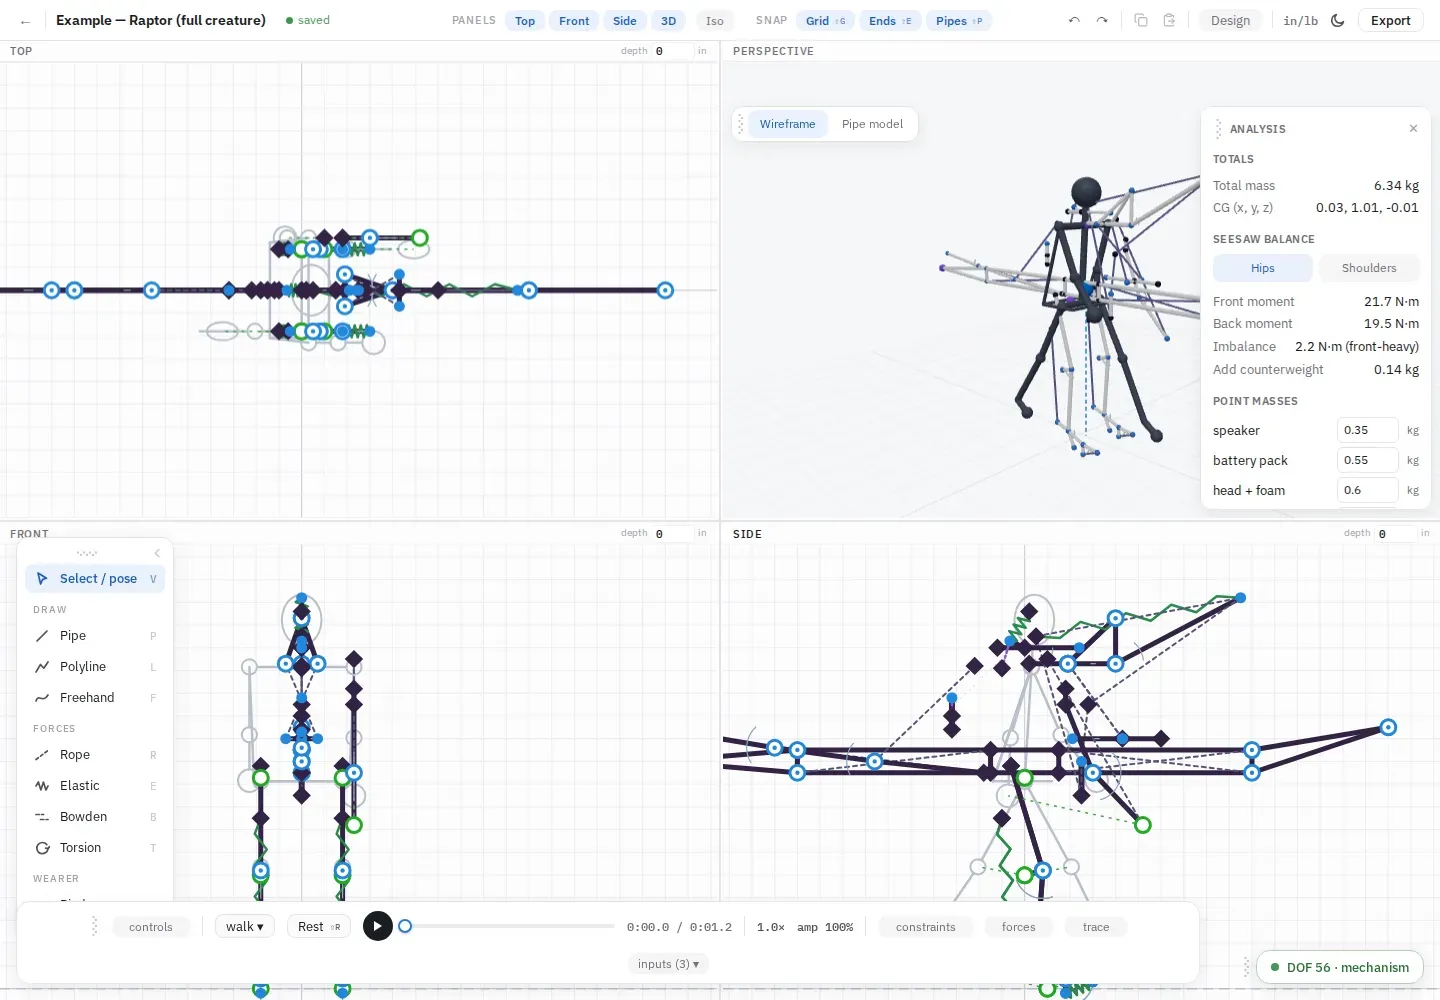
I’m really rusty at drawing and found I couldn’t sketch my way to a mechanism, so I built tools instead. Riglab (early July) simulates the linkages and answers whether the neck binds and the whole thing balances on my shoulders:
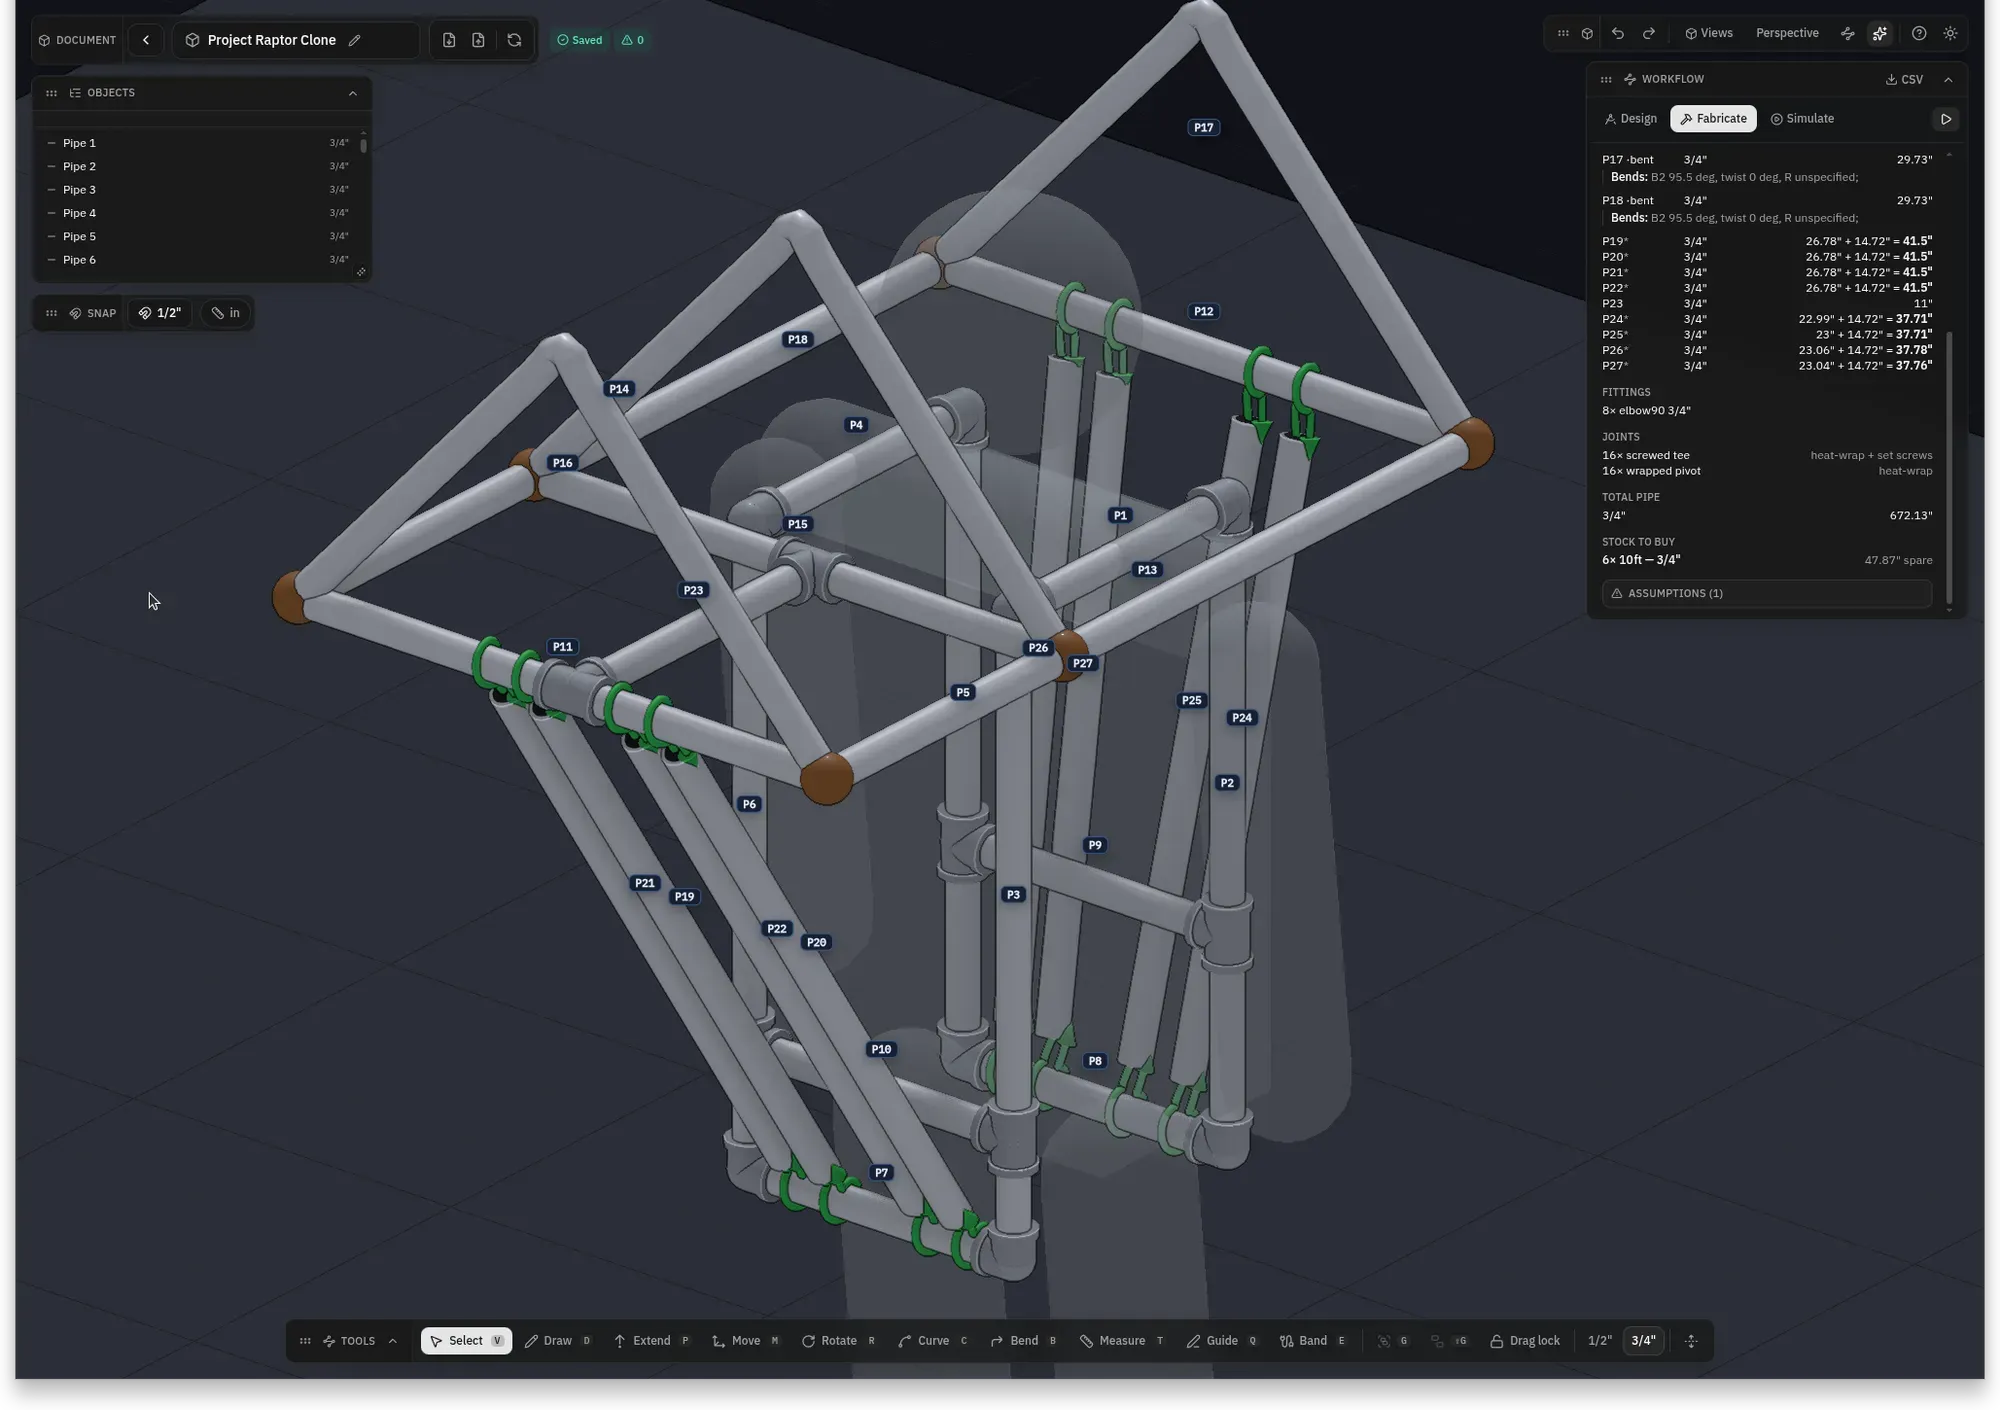
pvc-builder (a few days later) is where the creature actually got drawn: it infers fittings, simulates joints, and produces the cut list I took to the hardware store.
I’m vaguely aware that writing two pieces of software before making a single cut says something about me but I’m unsure what the statement is…
The build timeline
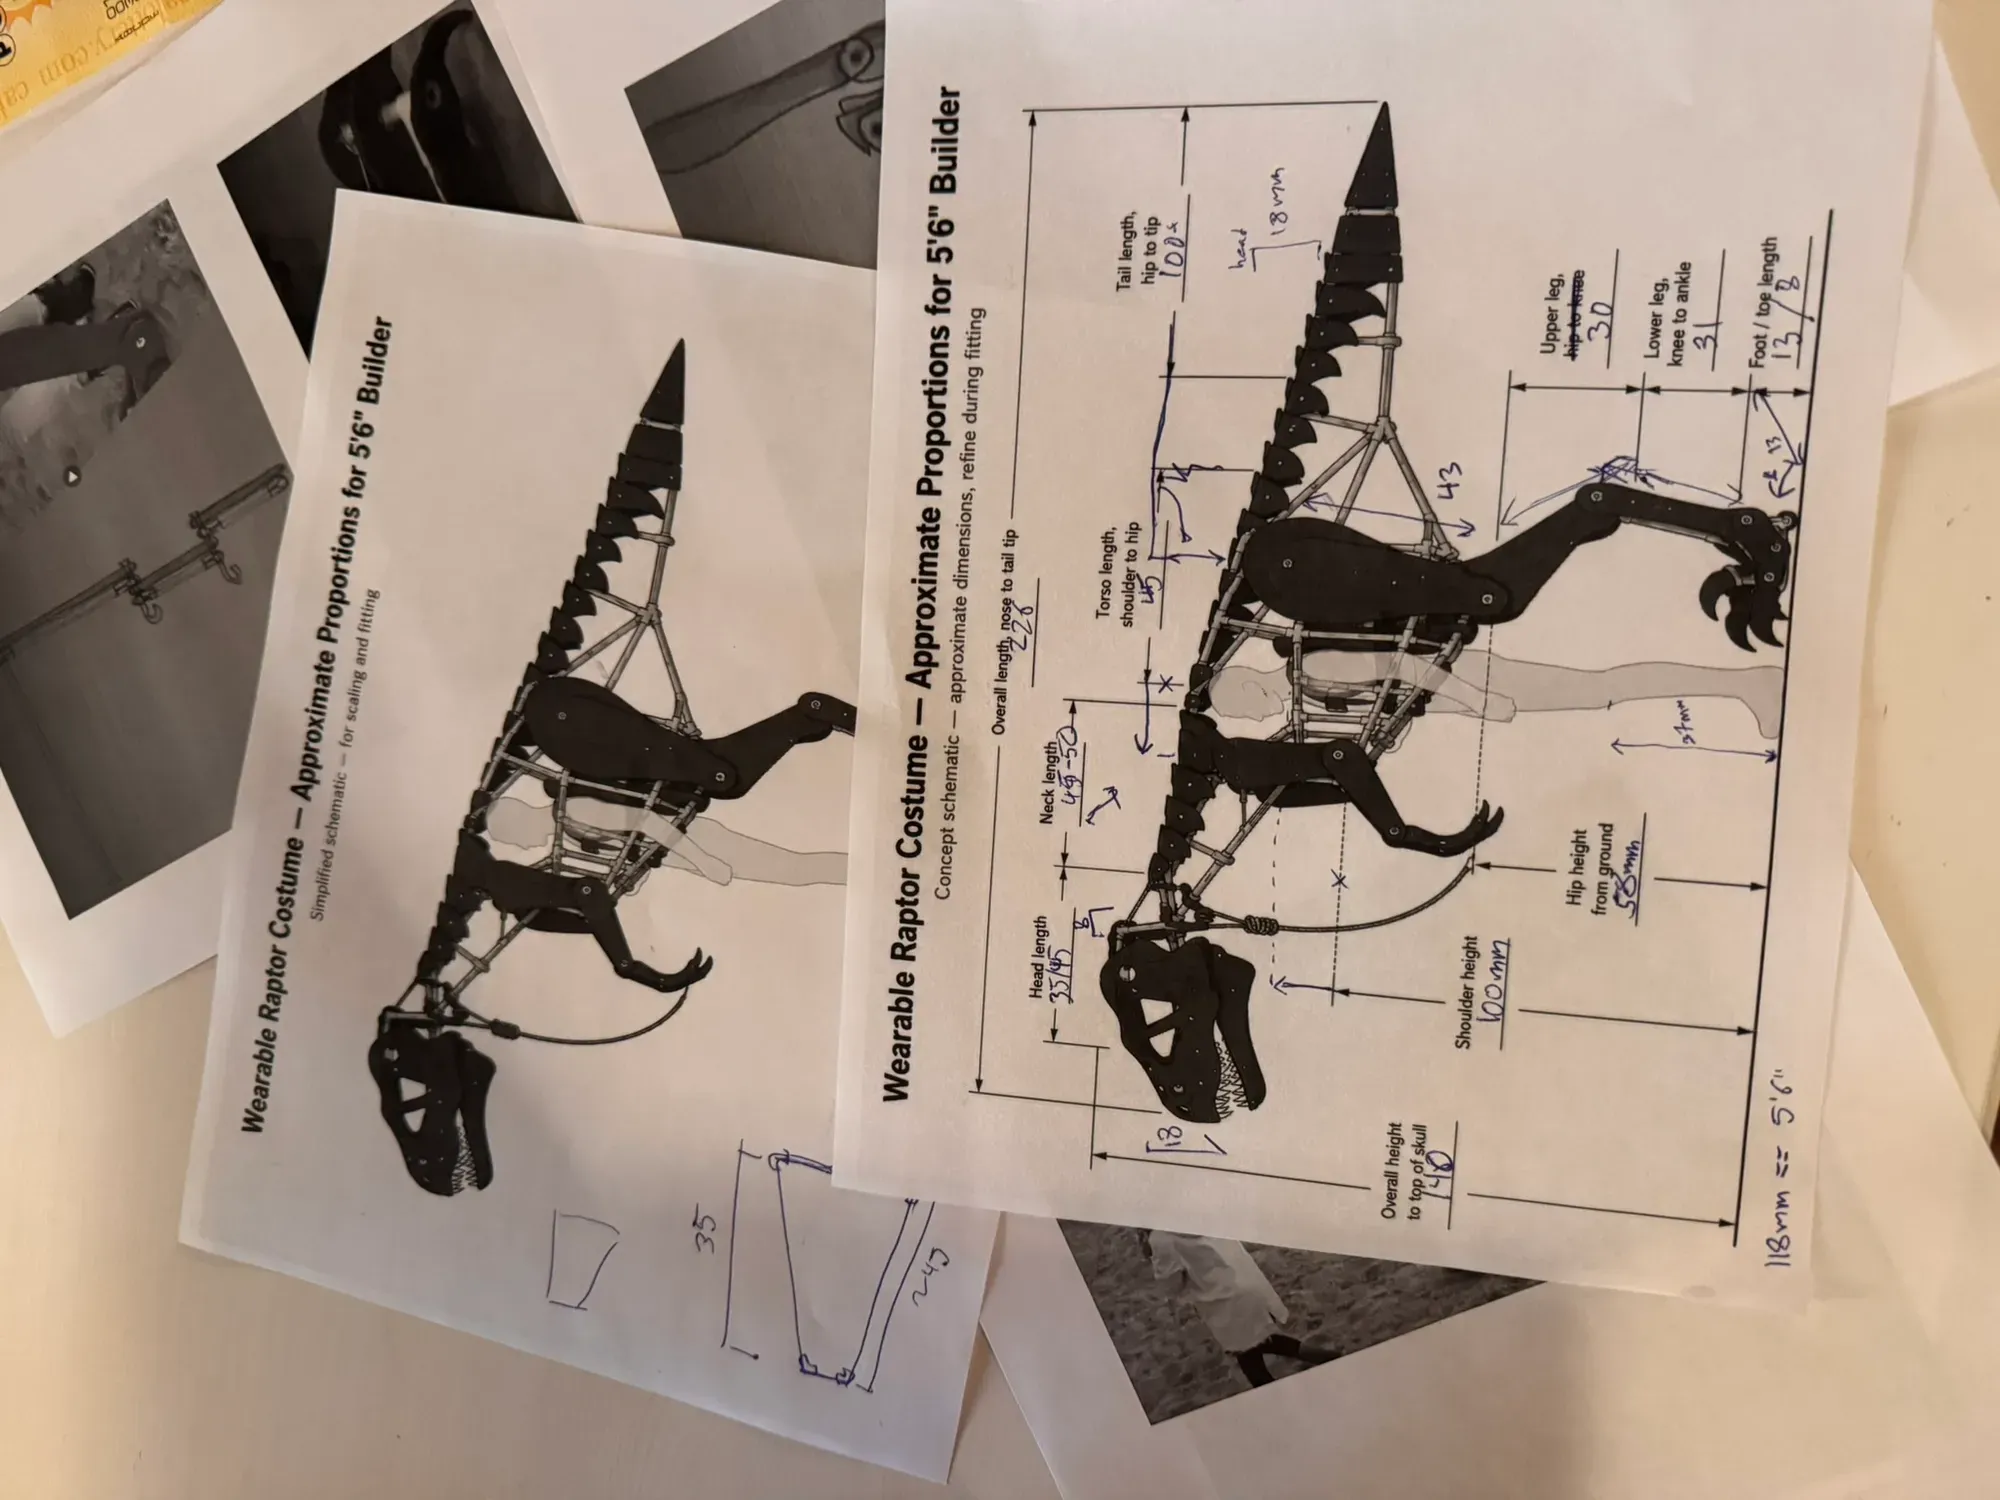
July 15. Pipe, fittings by the jar, a dress form wearing the pack harness, and the first dry-fit sections on the living room floor. The printed proportion sheets (drawn for a 5’6“ builder and covered in handwritten corrections) ran the show.
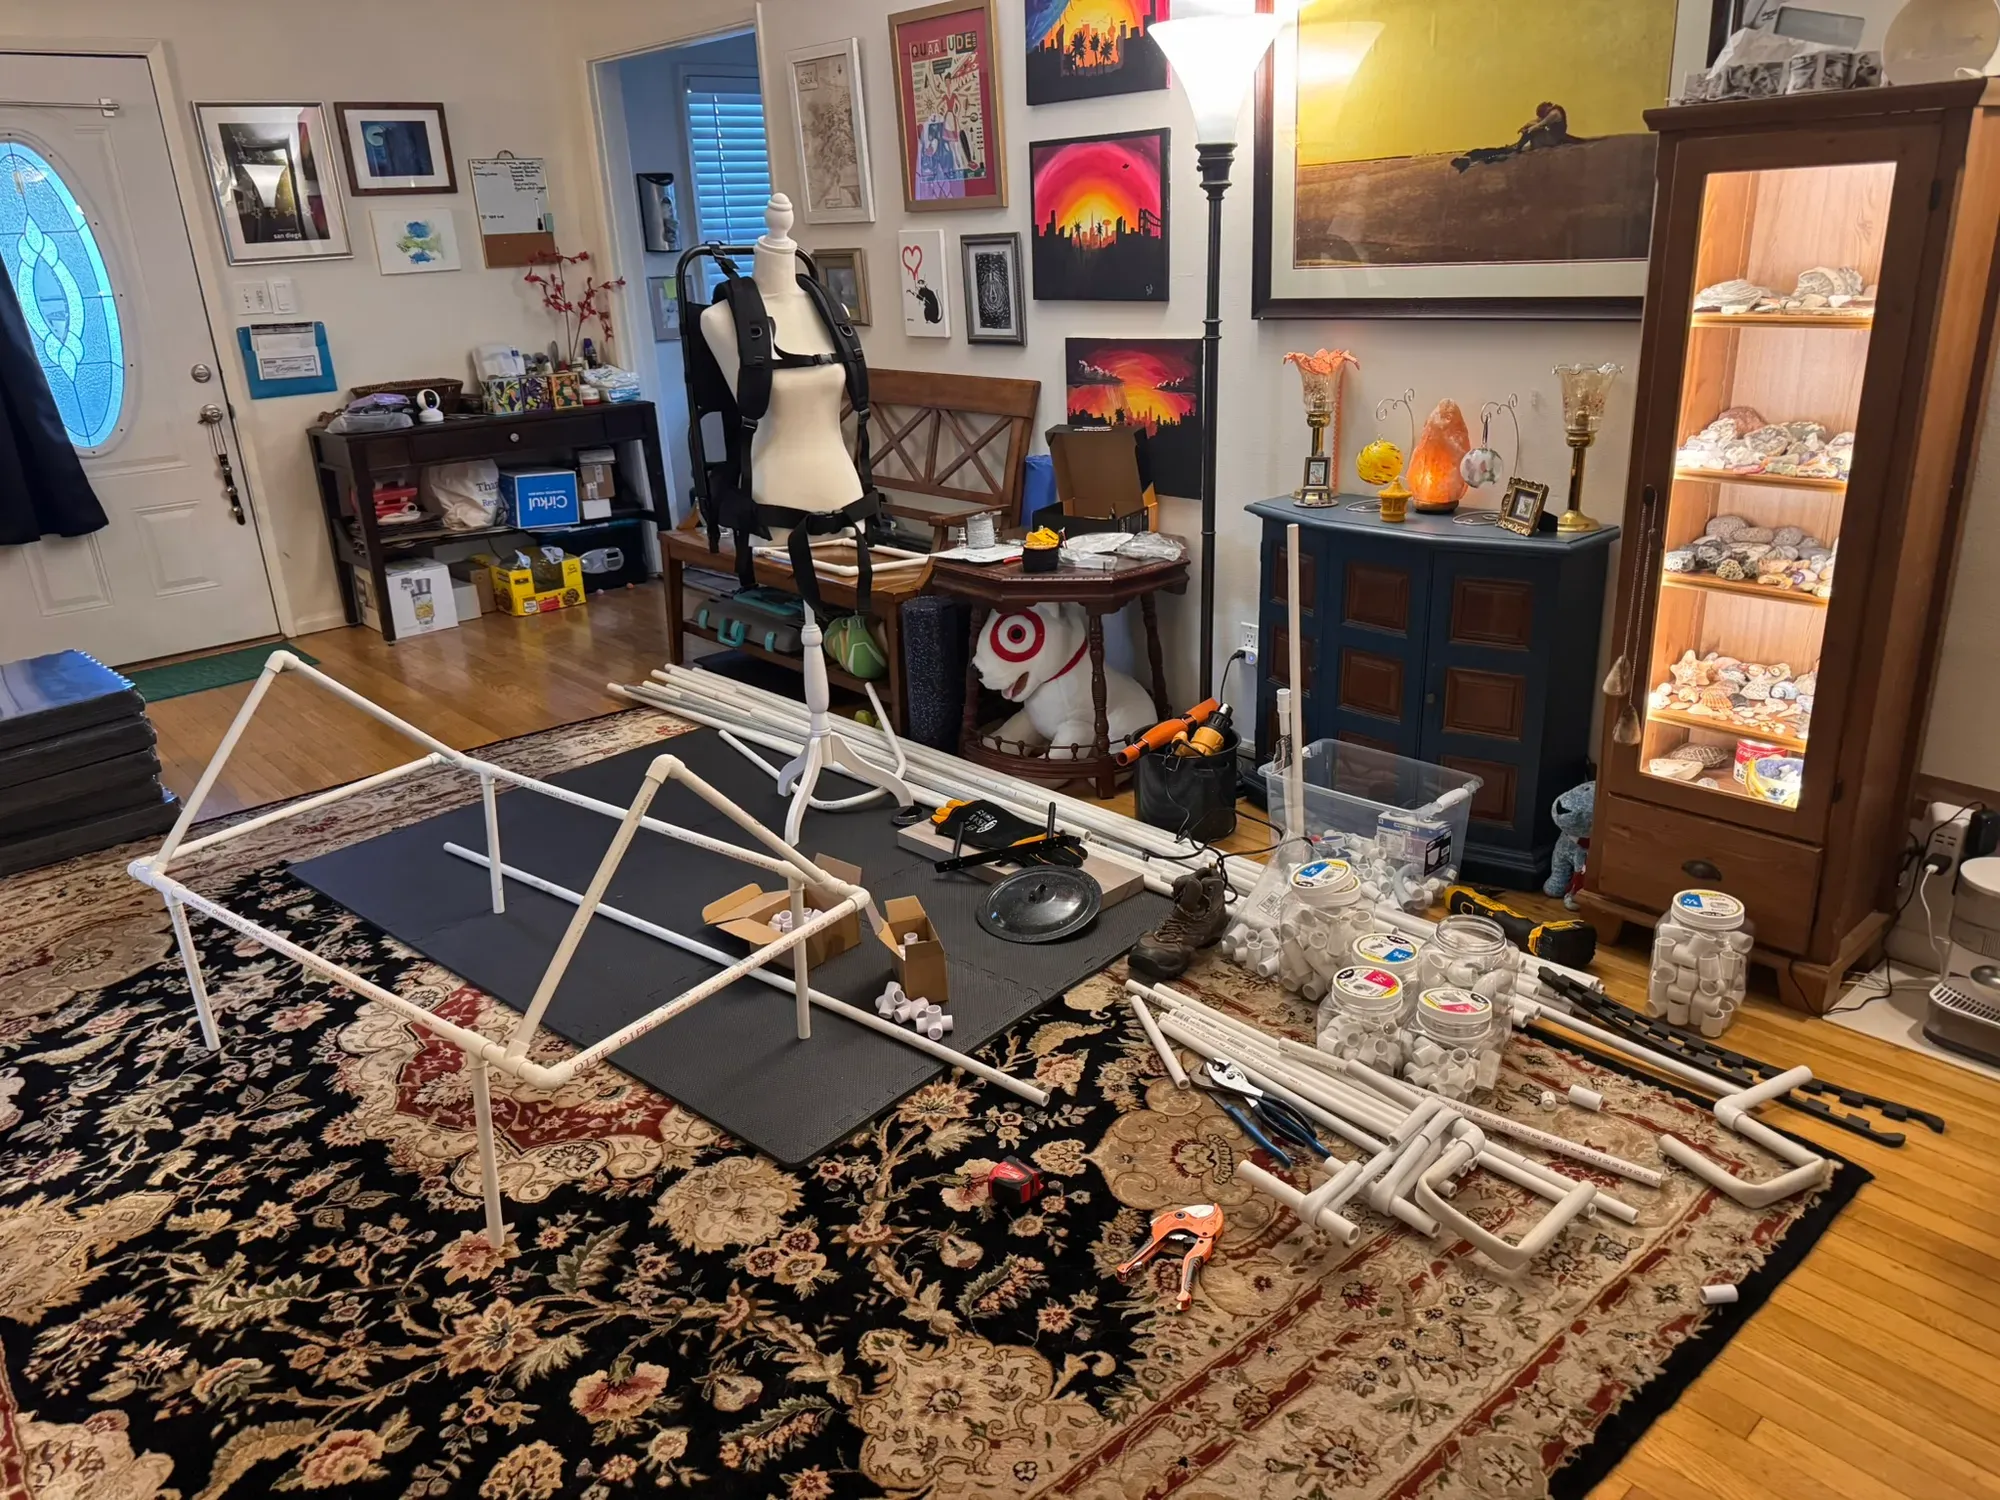
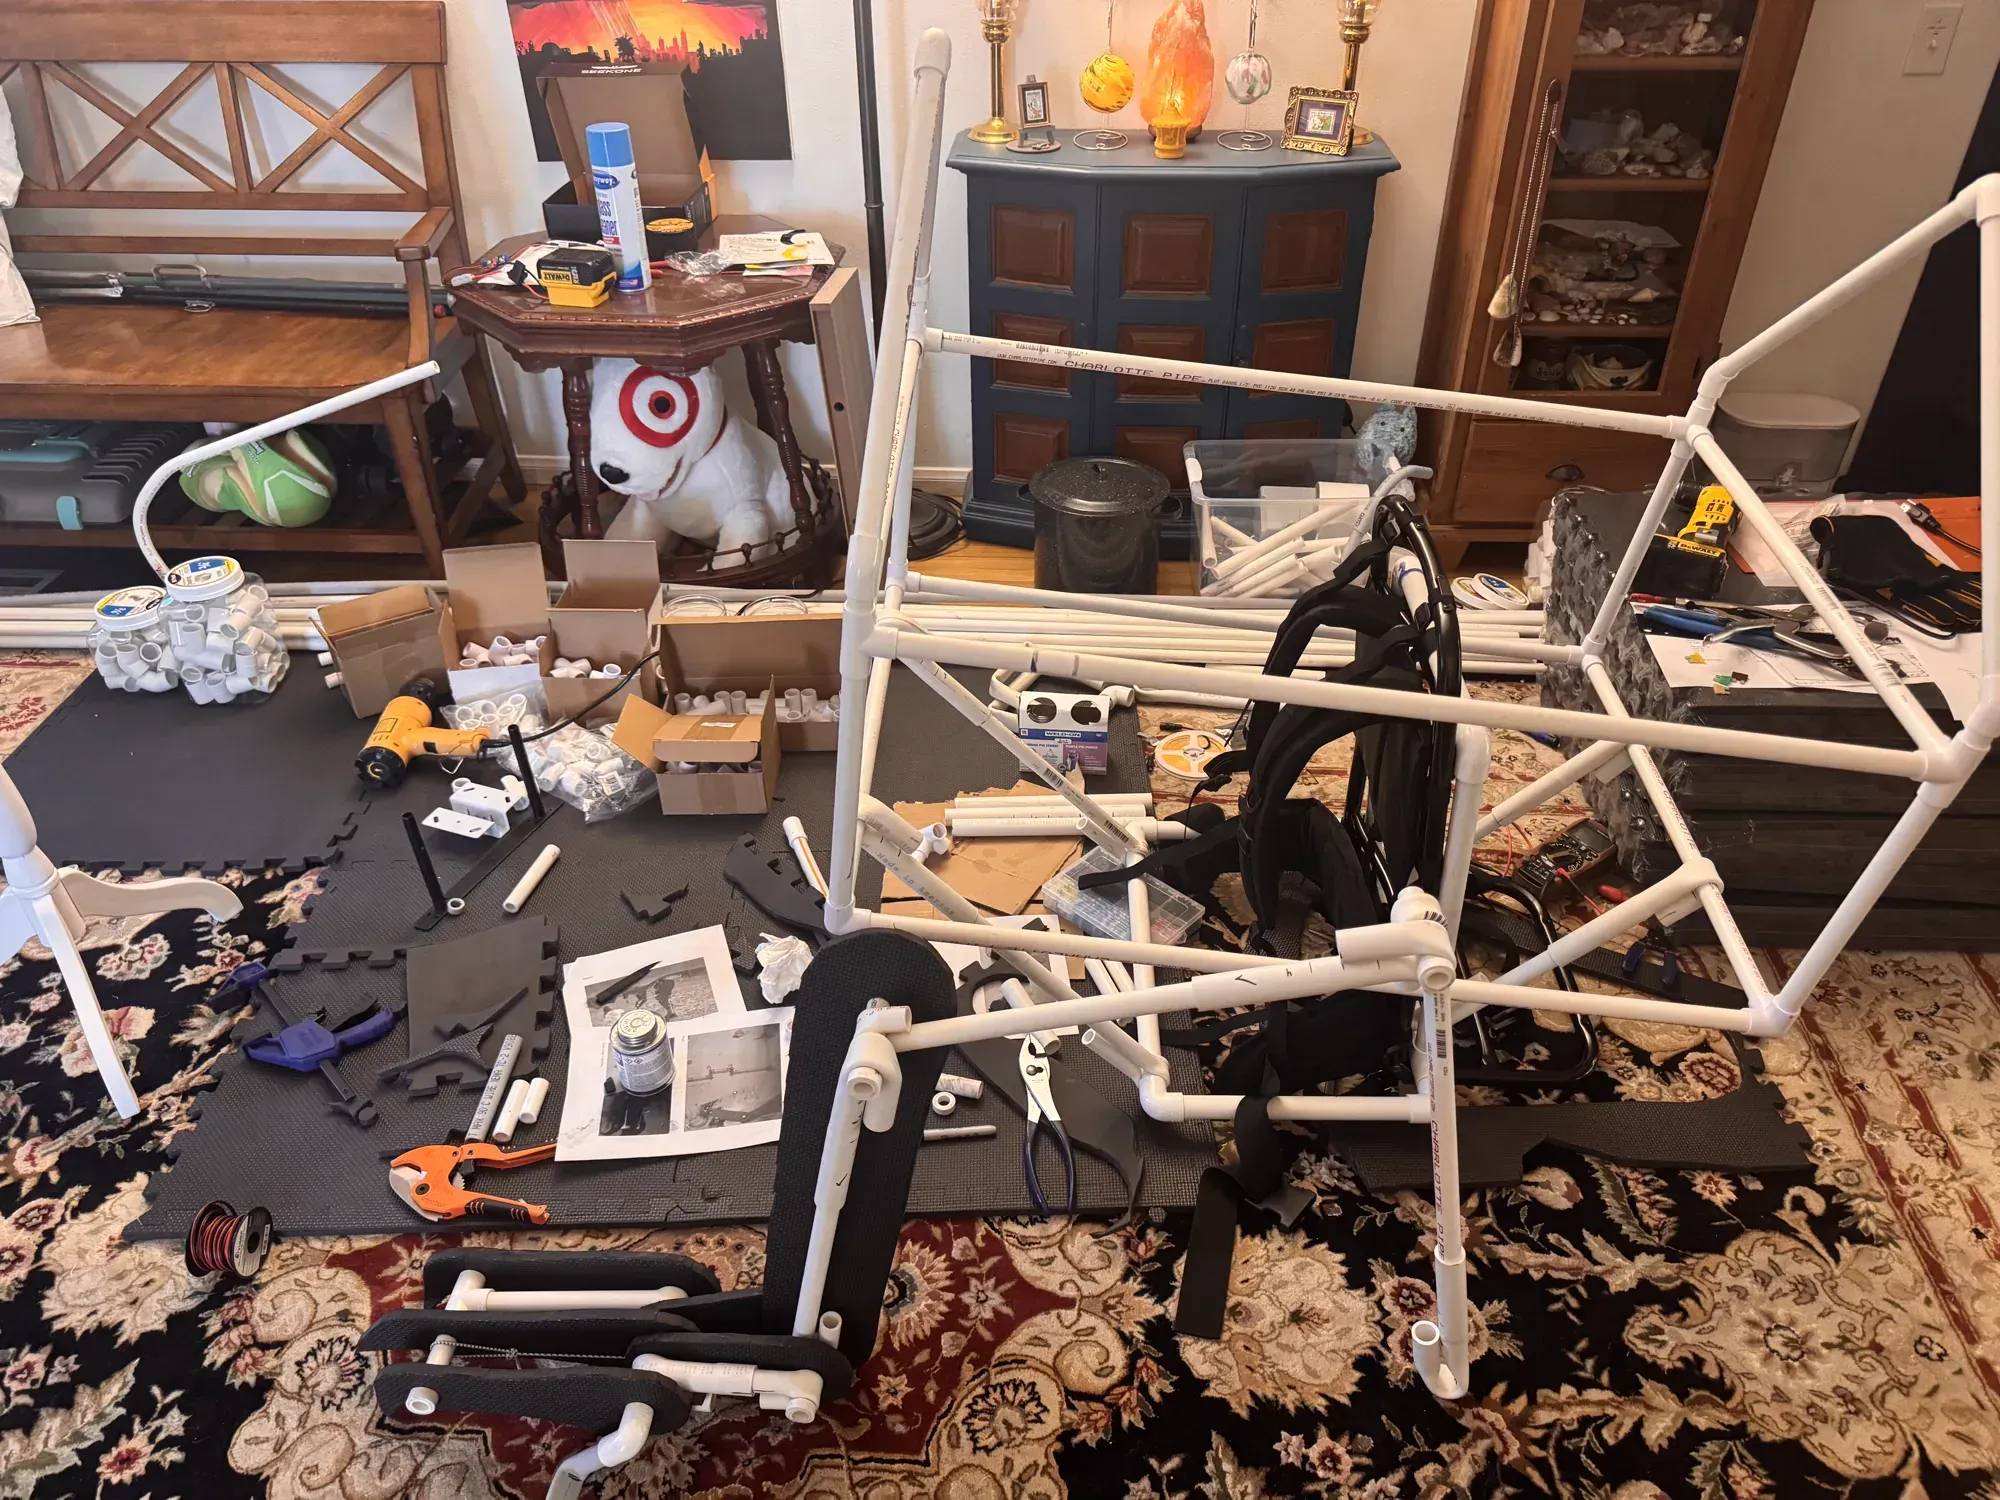
July 19. Glue day. Dry-fit parts on a dress form became permanent structure, and the living room stopped pretending to be a living room.
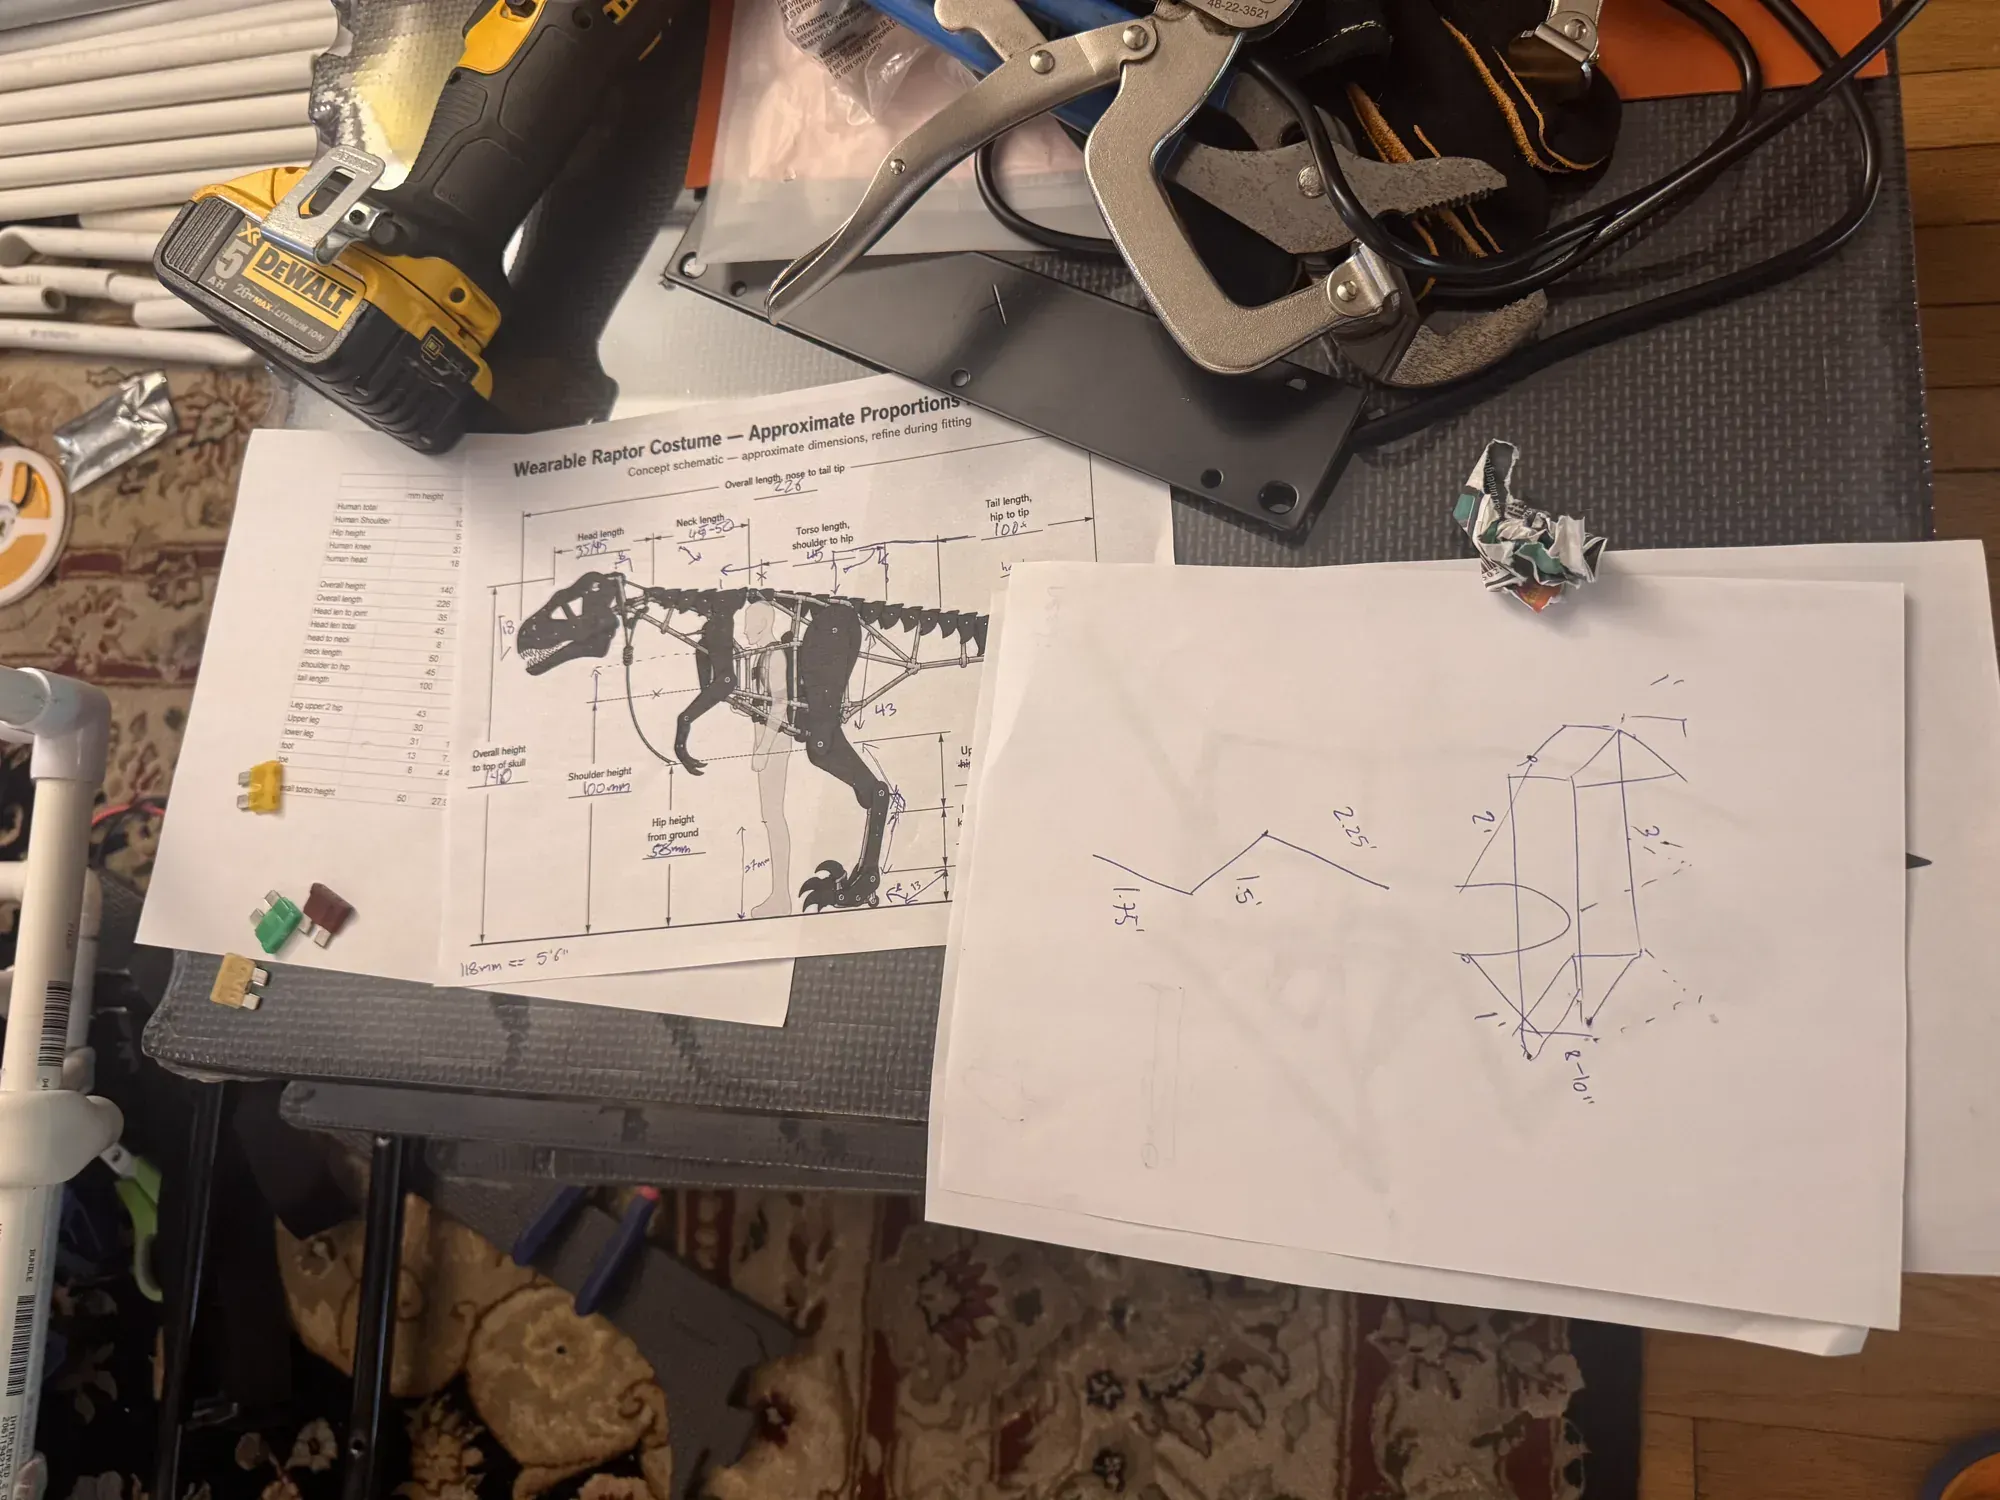
The process was part software, part paper, and part measurements scribbled wherever they’d fit:
July 21. The first leg walk test, and the moment this stopped being an abstract engineering exercise. The leg linkage rides my own leg and the foam profiles move like the animal:
(Not long after this video I decided the body needed to come down by a few inches, so I cut it down. Simulate all you want; some proportions only reveal themselves when the thing is strapped to you.)
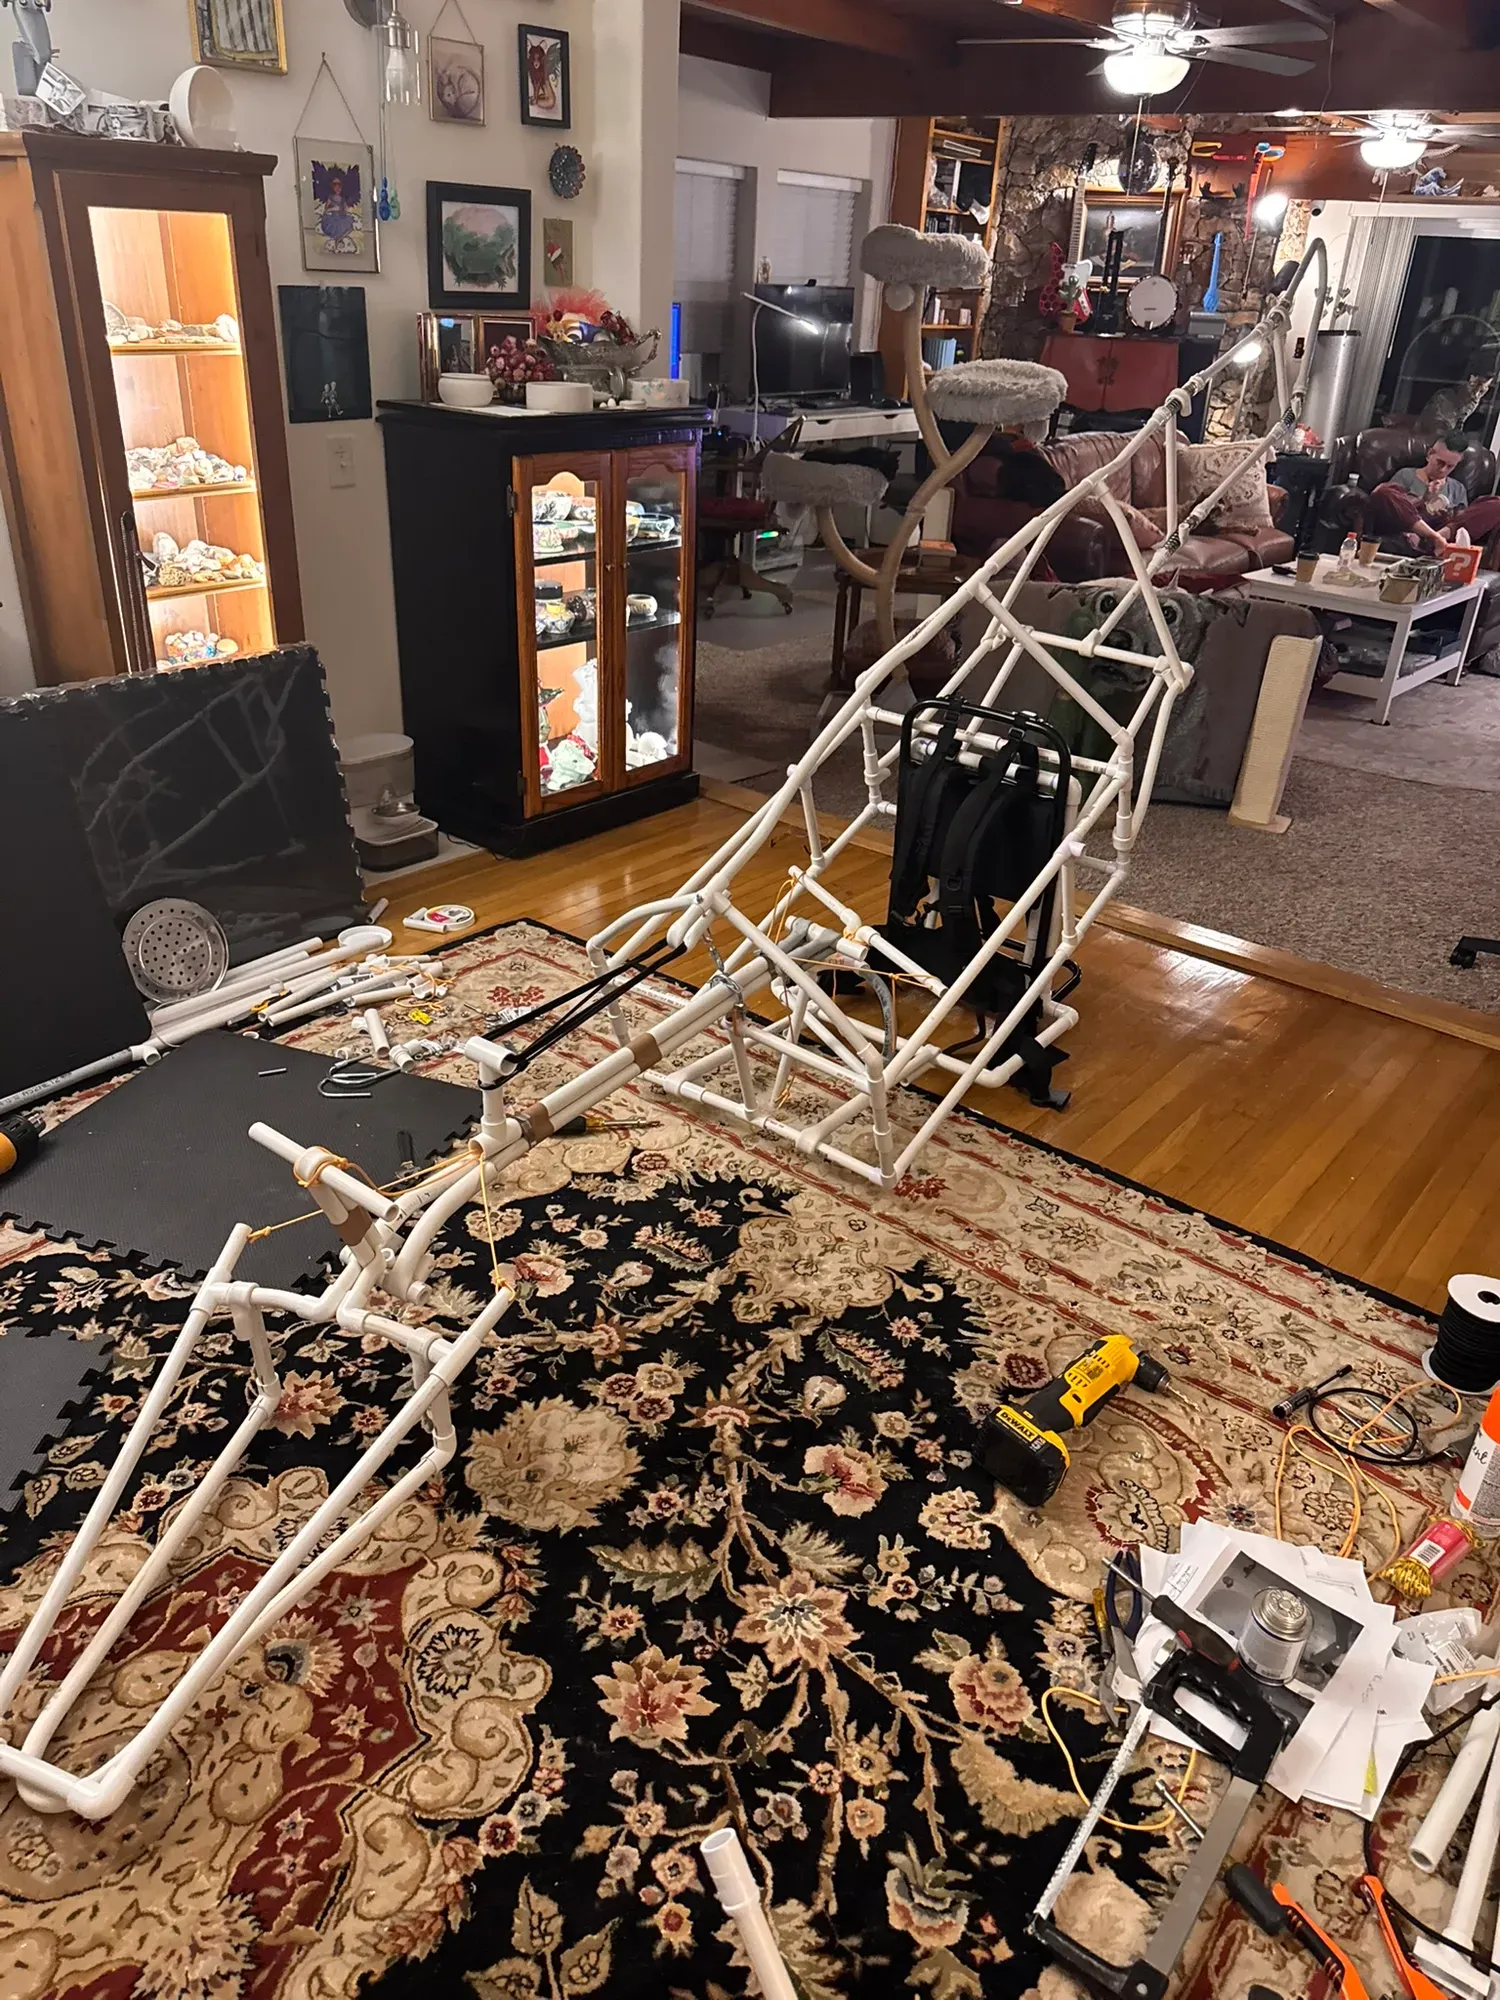
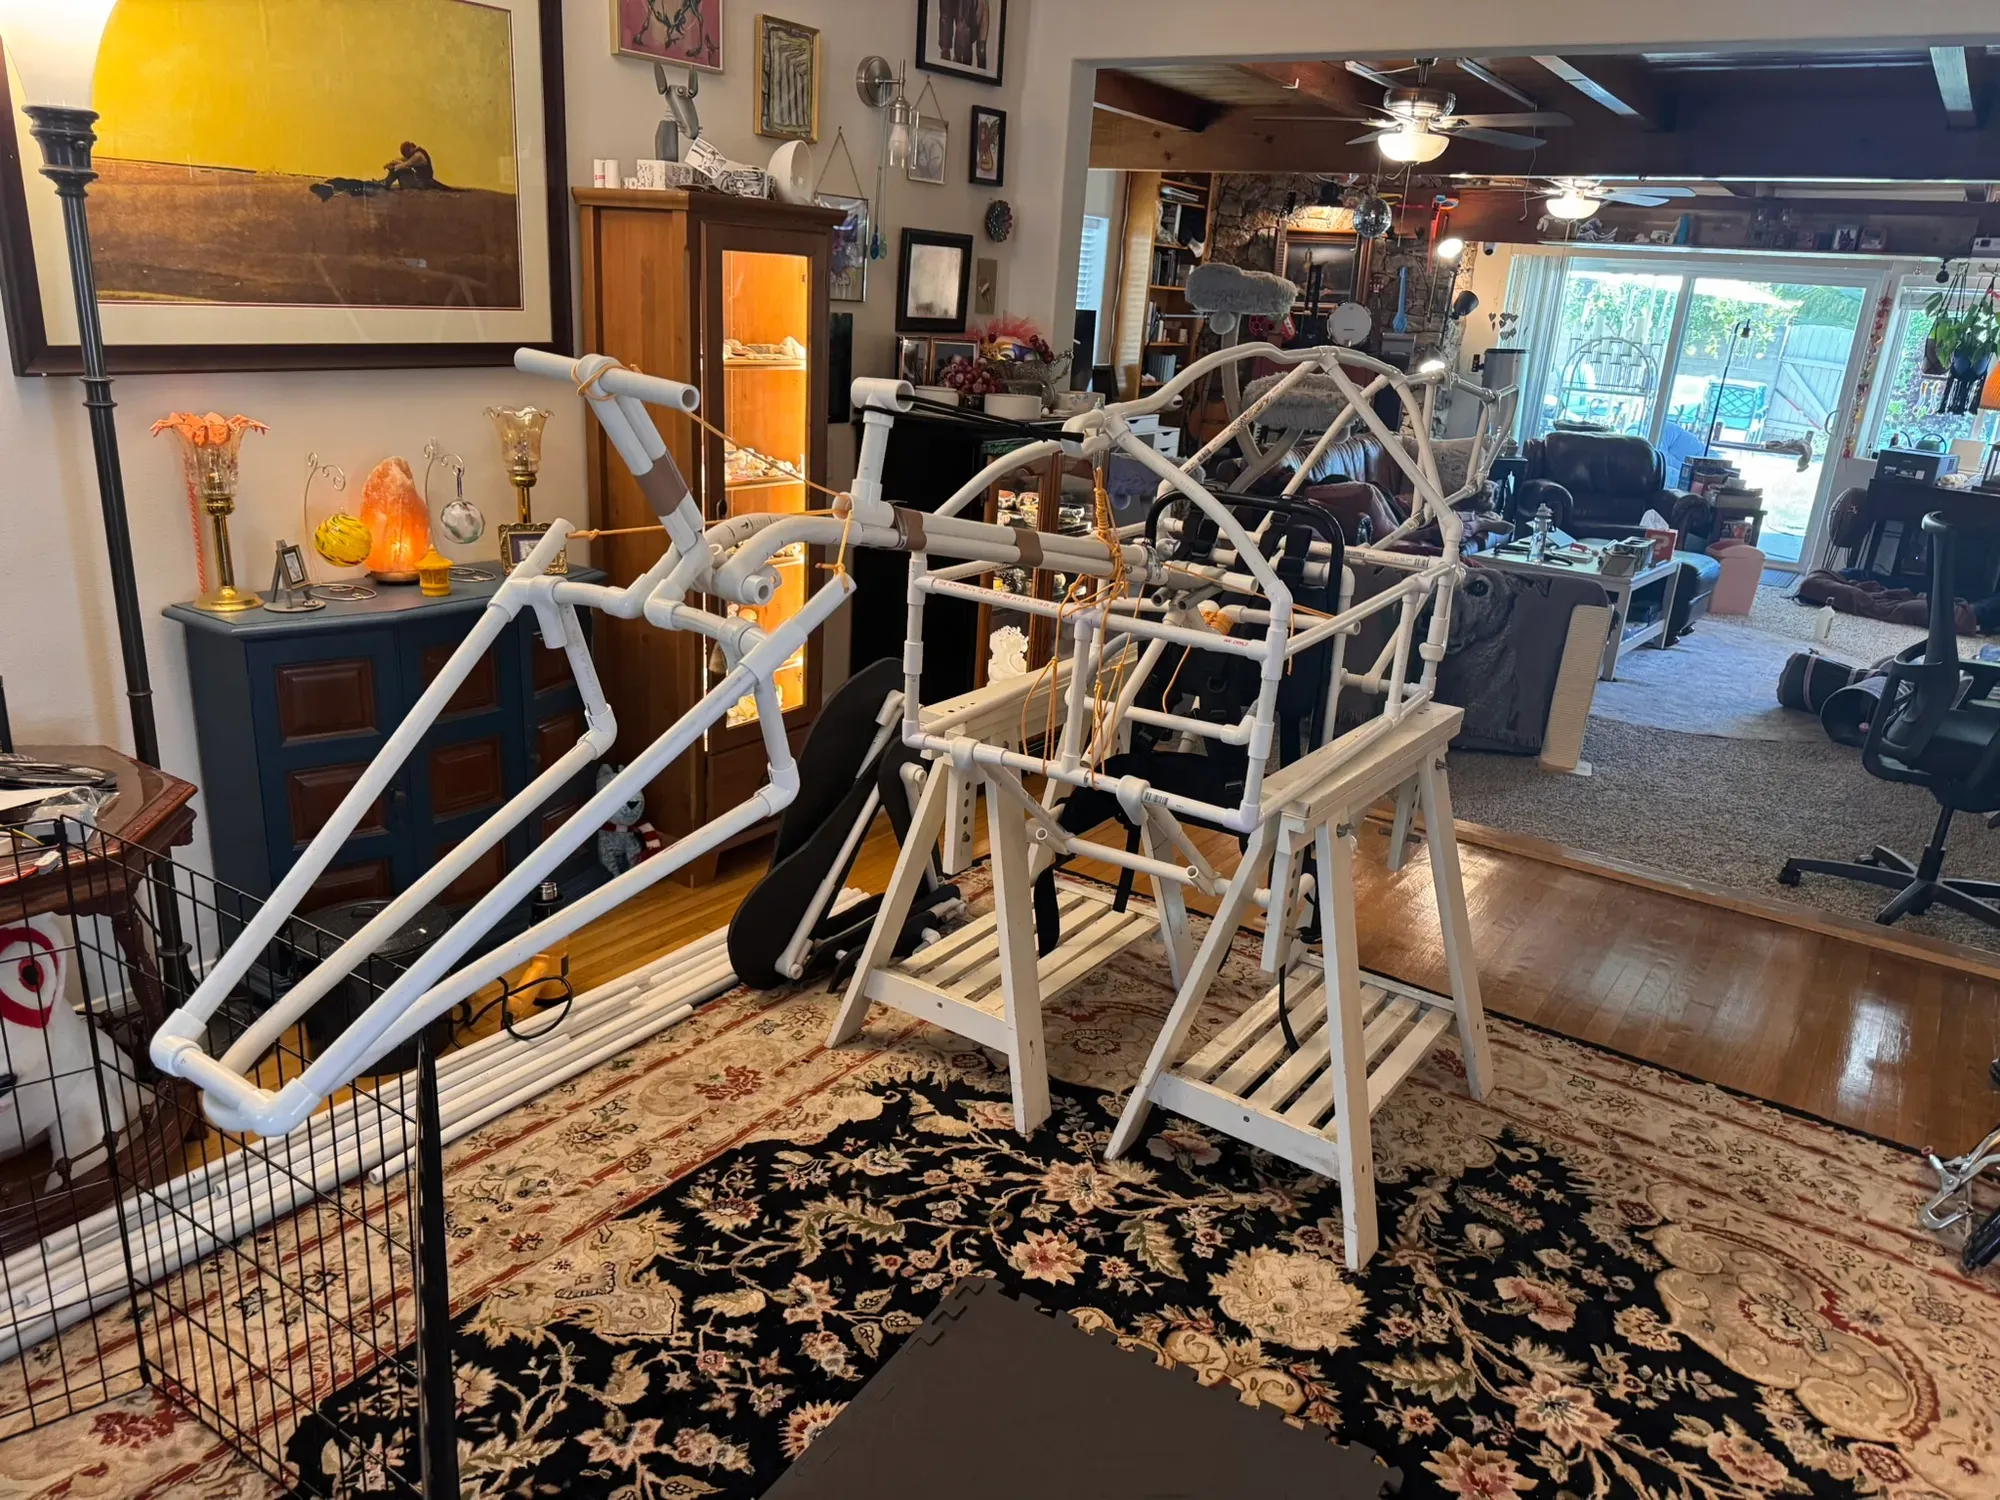
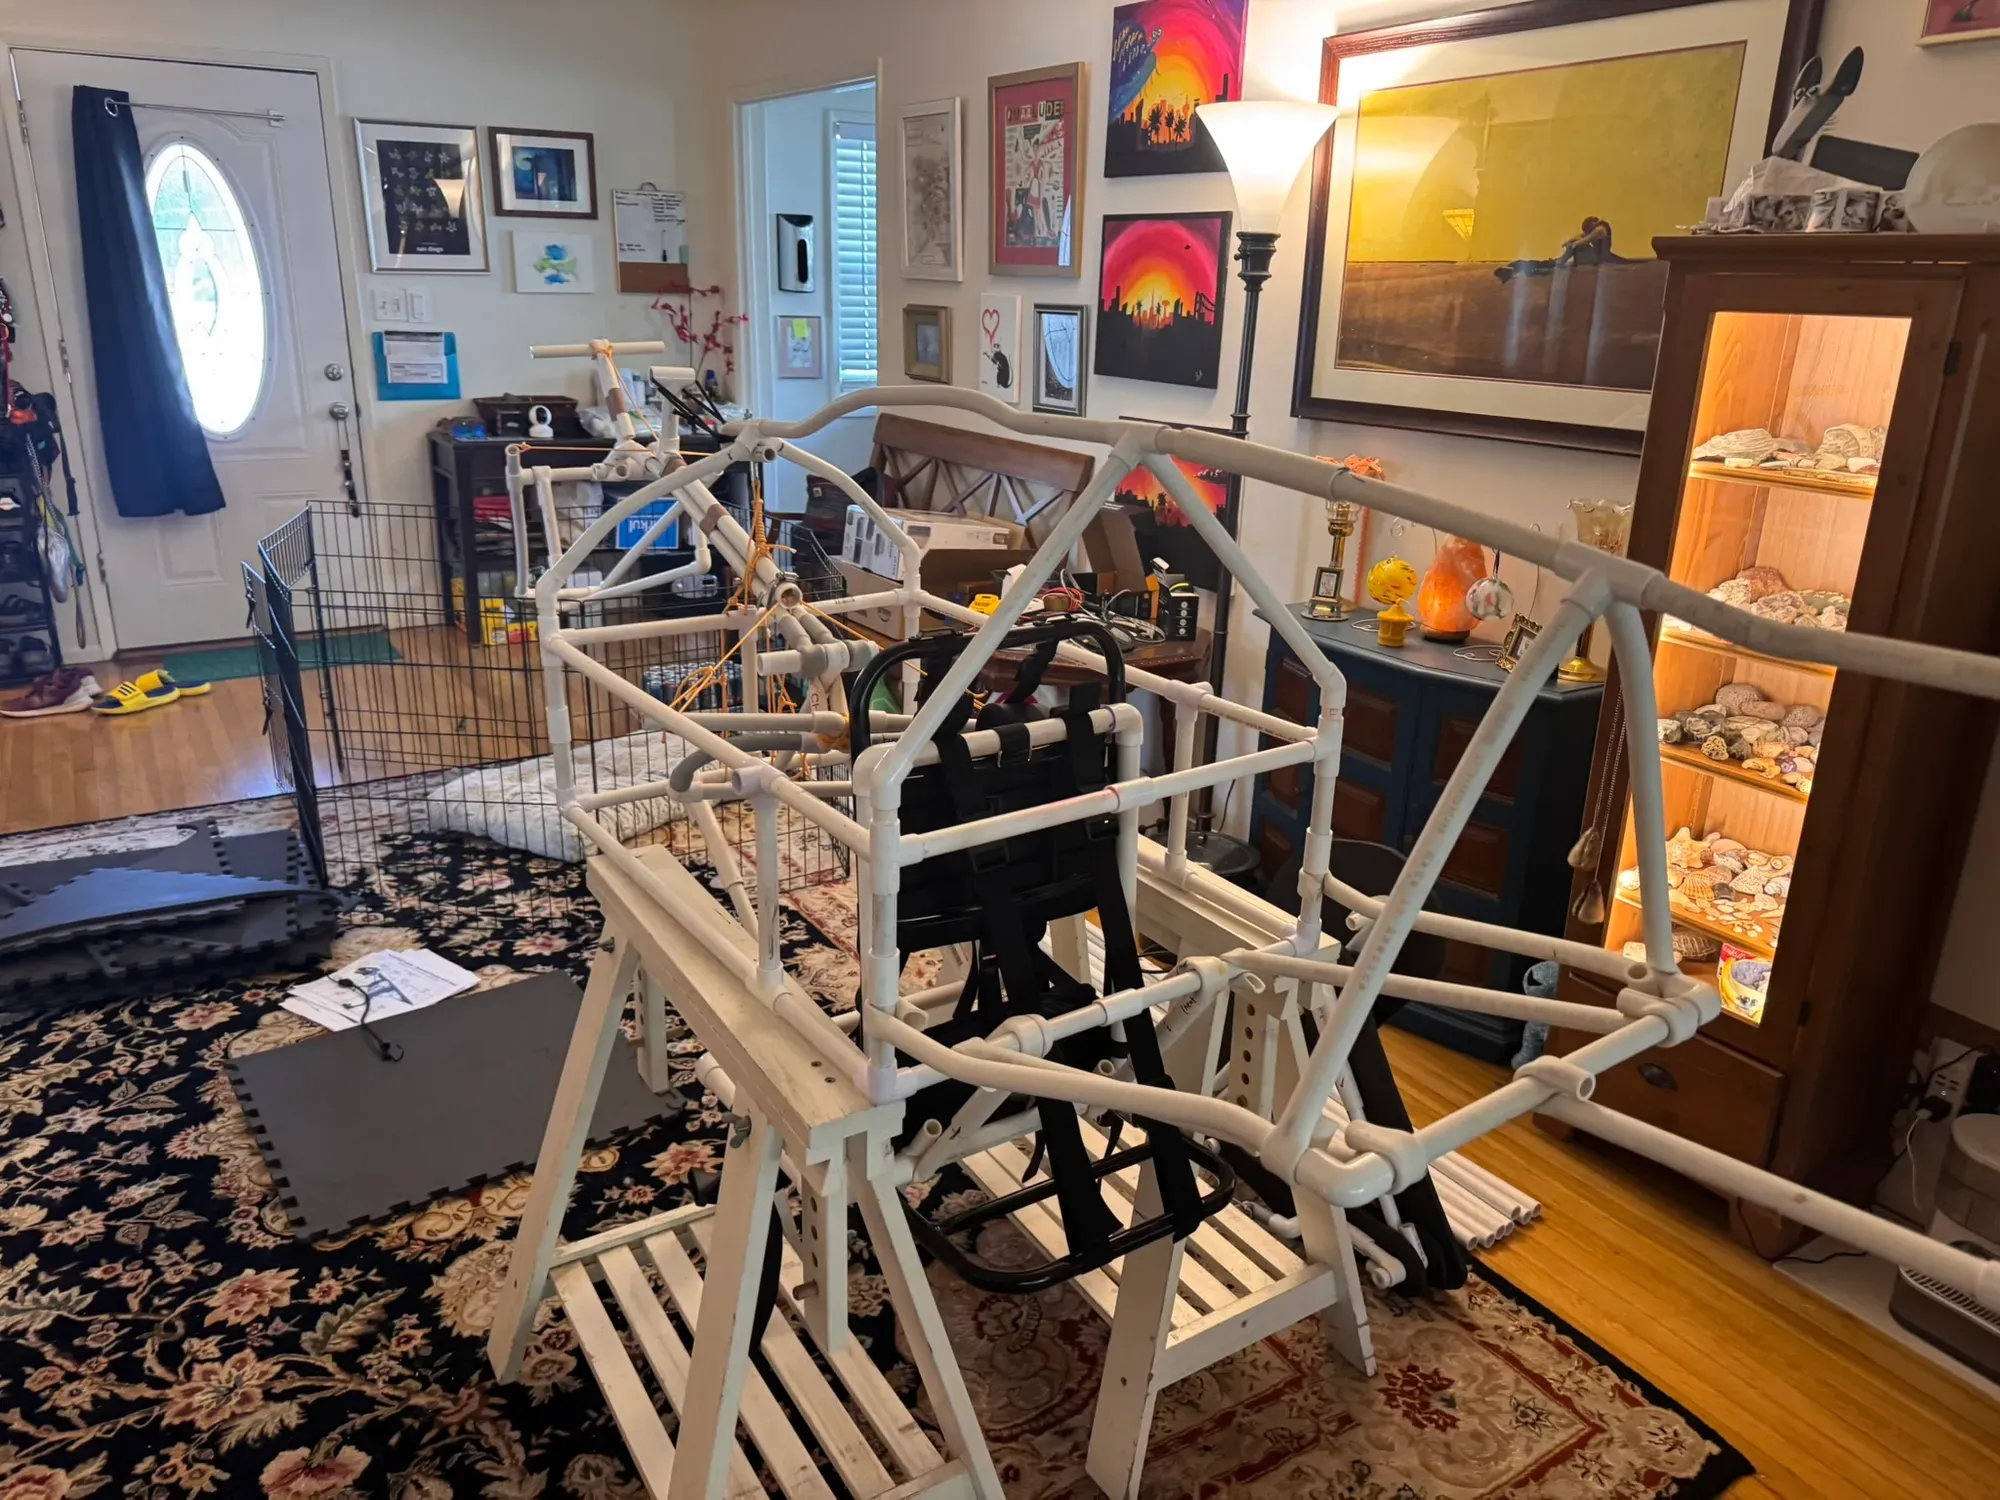
July 25 and 26. The full skeleton came together: torso cage around the pack frame, the neck boom sweeping up, and the trussed tail out the back. Up on sawhorses it’s suddenly very large for a thing that has to live in a house with us.
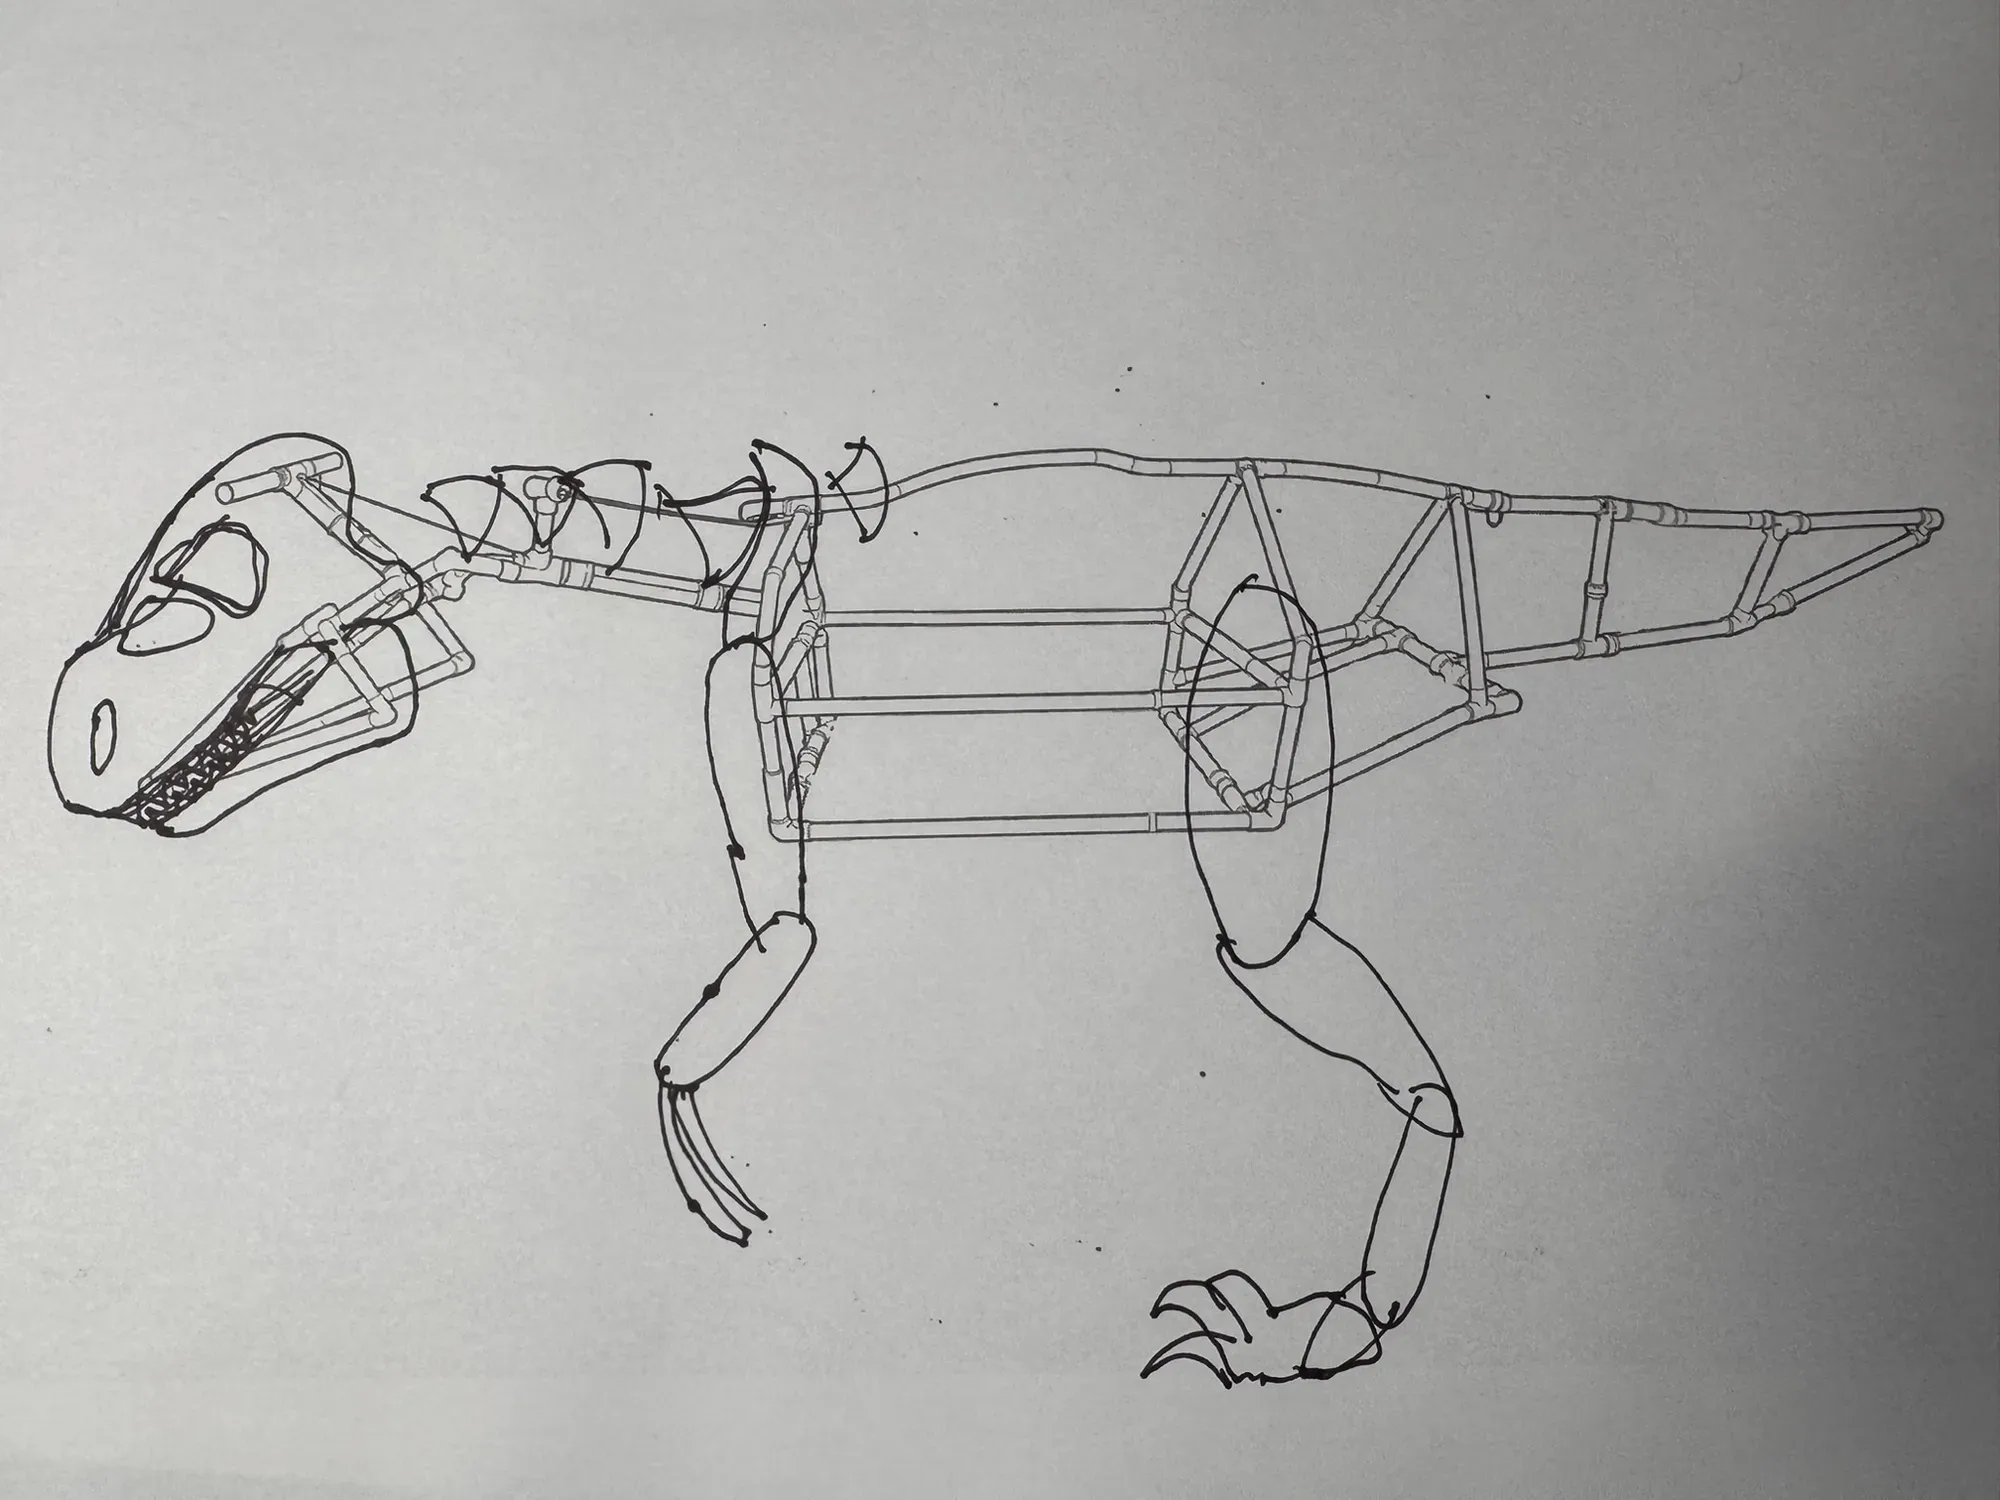
July 29. Head planning: ink over a printed photo of the real frame to work out the skull, jaw, and claws.
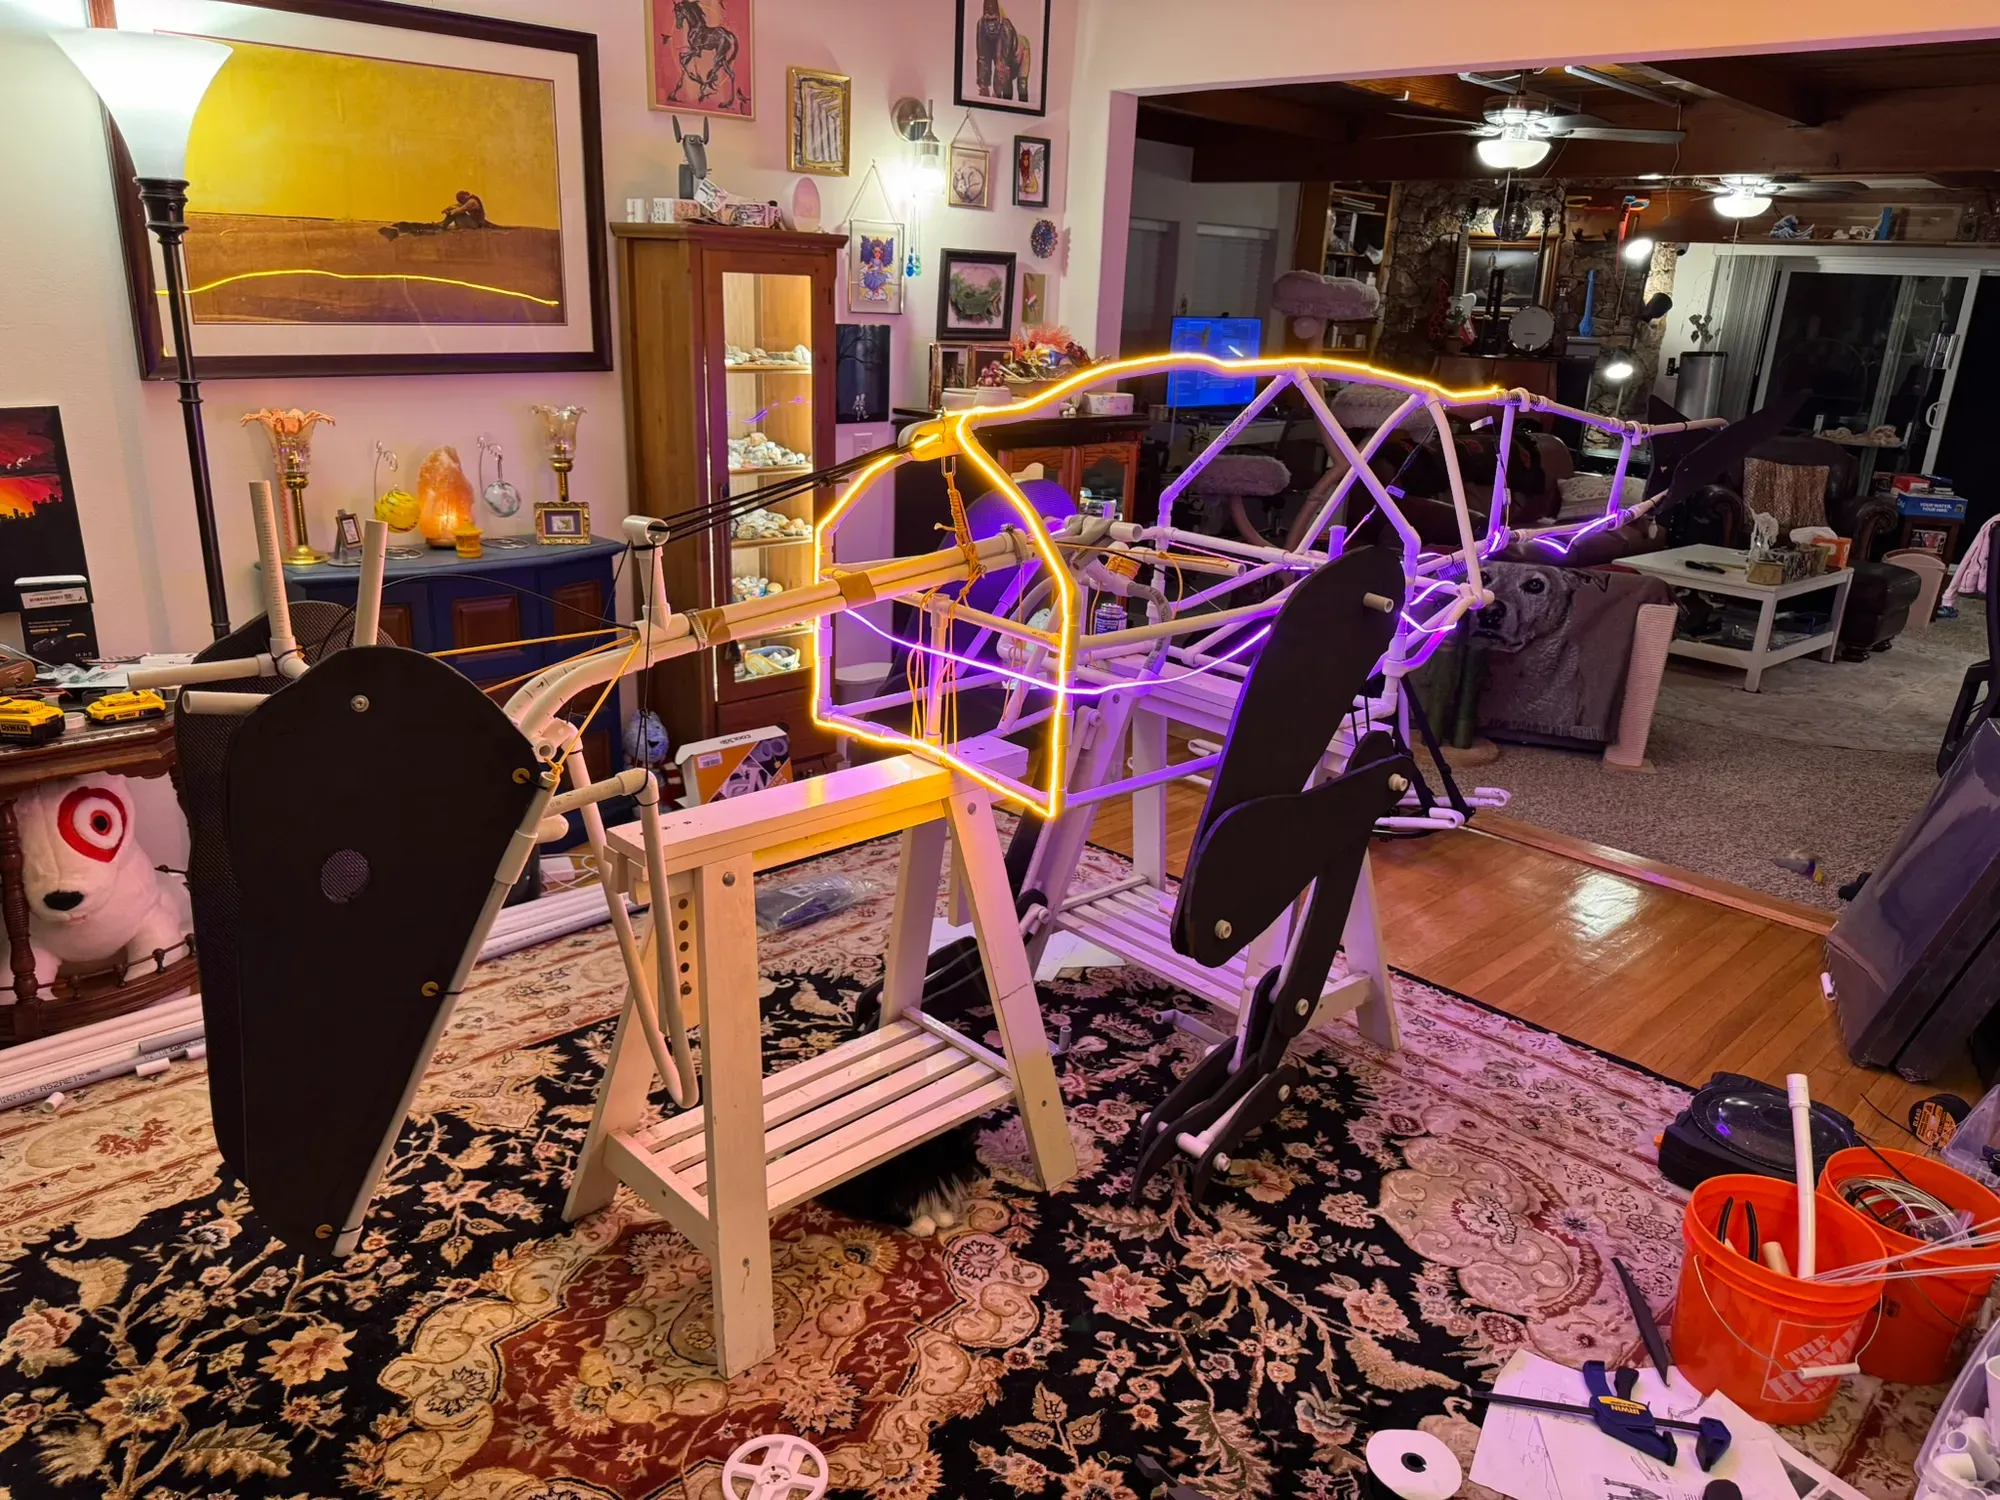
July 31. Lights. Orange and pink 24V COB LED strips traced along the frame for a night test, with the first dark foam body plates hung in place. Power is a DeWalt tool battery through a boost converter, which works and also worries me: I’m half expecting the strips to nuke the batteries, so the current plan sketch involves an ESP32 running WLED, physical buttons, and some actual current limiting instead of vibes. This is the first photo where I could squint and see it on the playa at 2am.
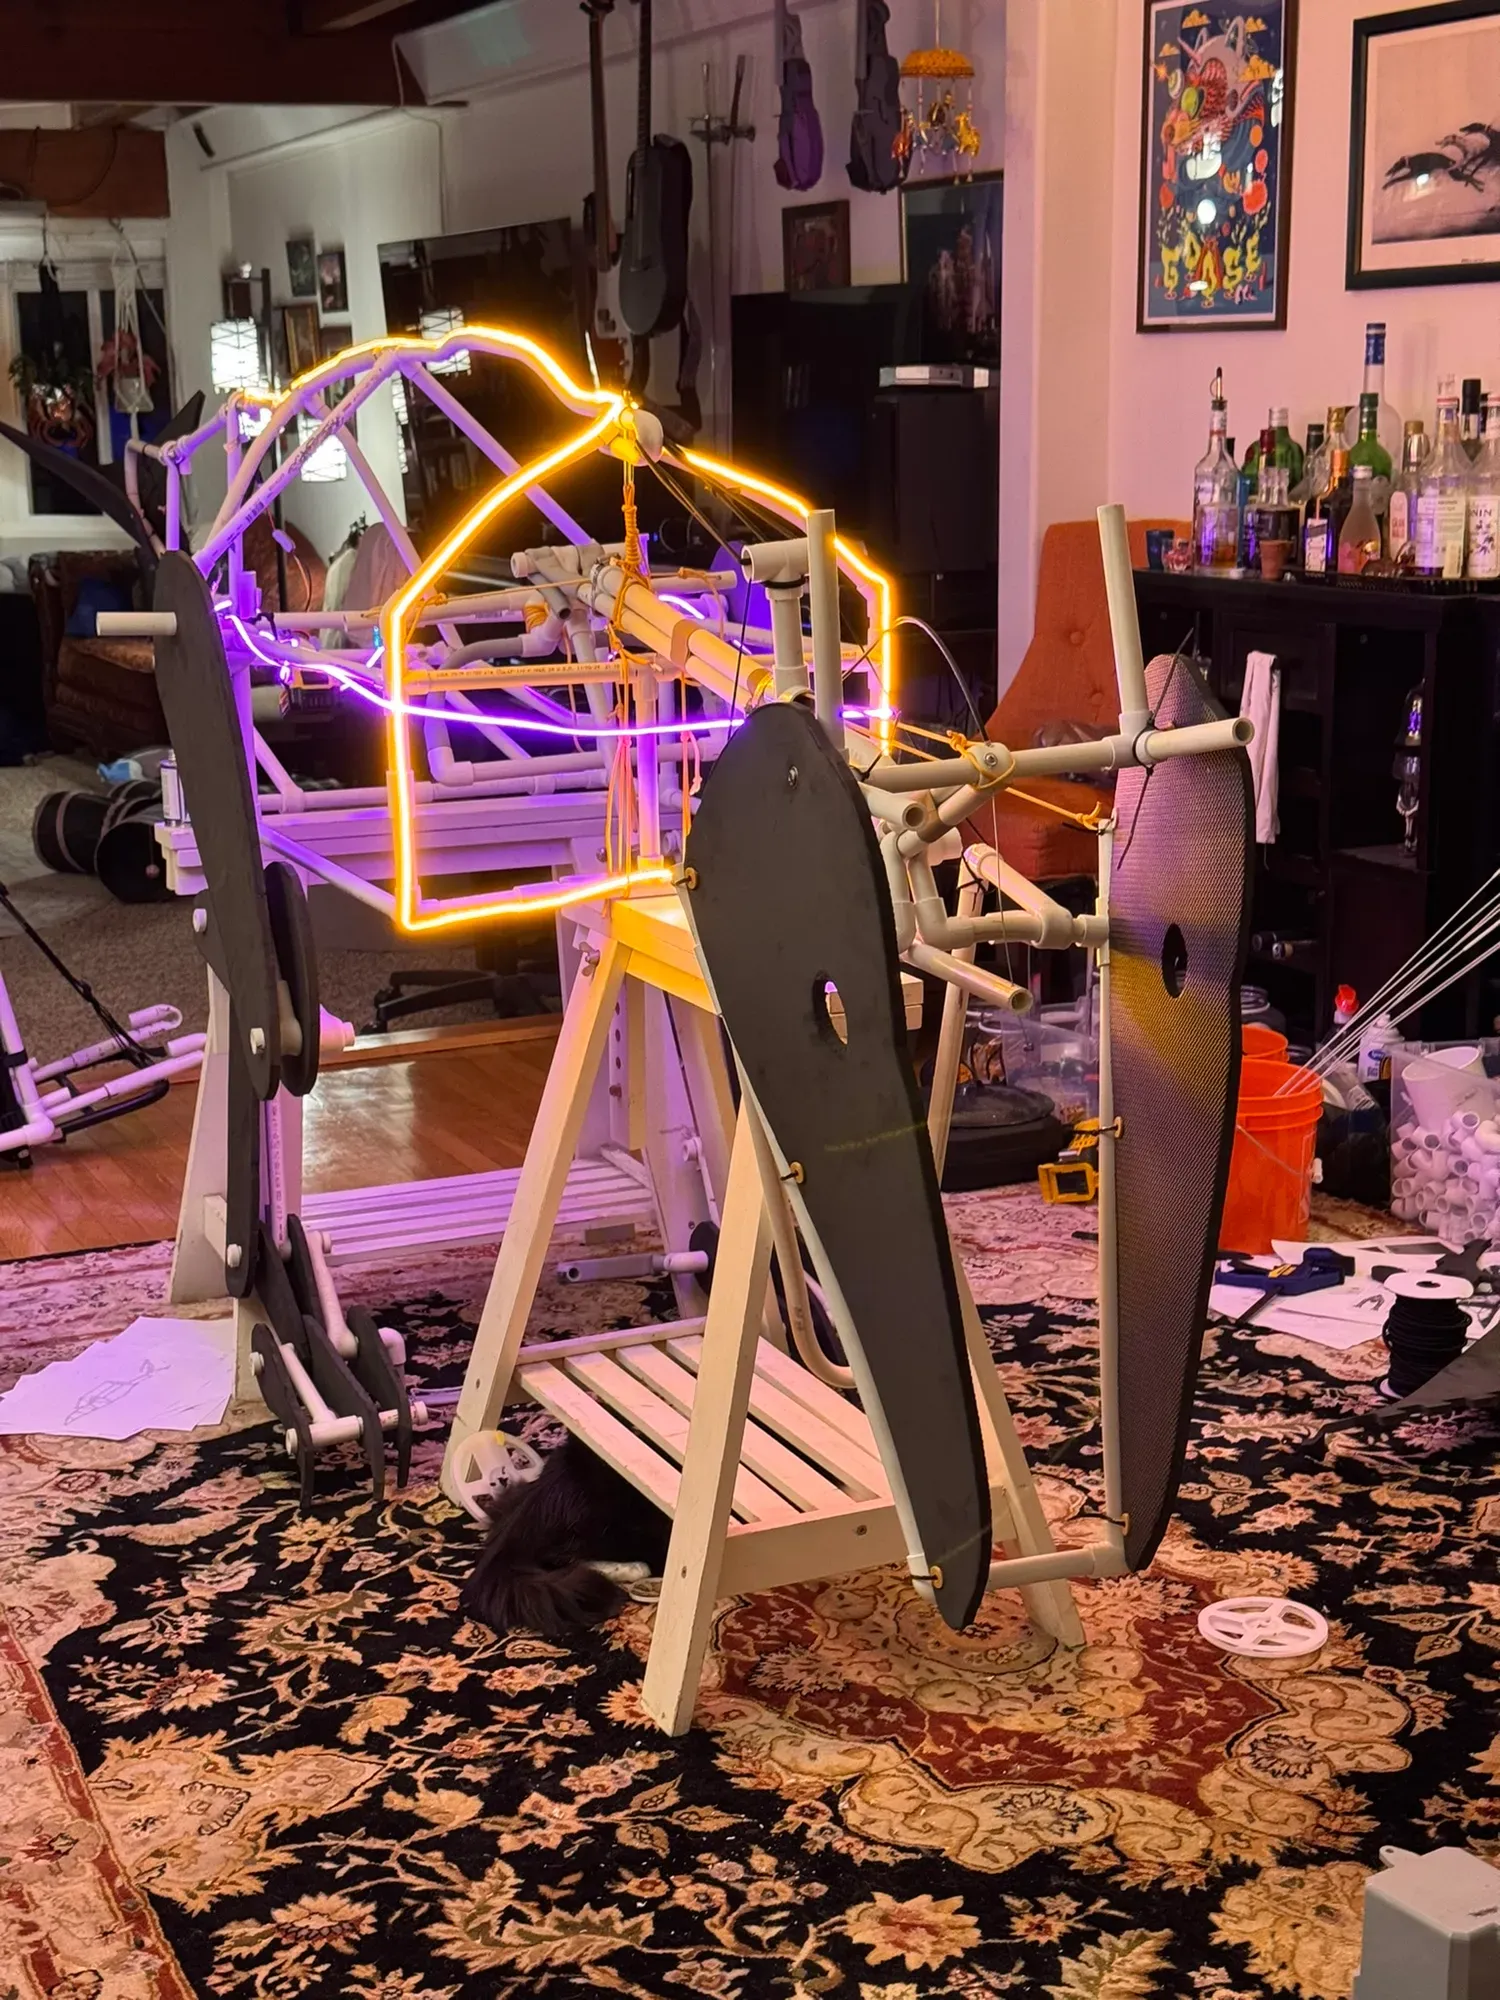
August 6. Two milestones in one day. The head is (mostly) done: foam-clad skull and jaw over the PVC frame, jaw linkage finished, and the brake cable that runs it wired.
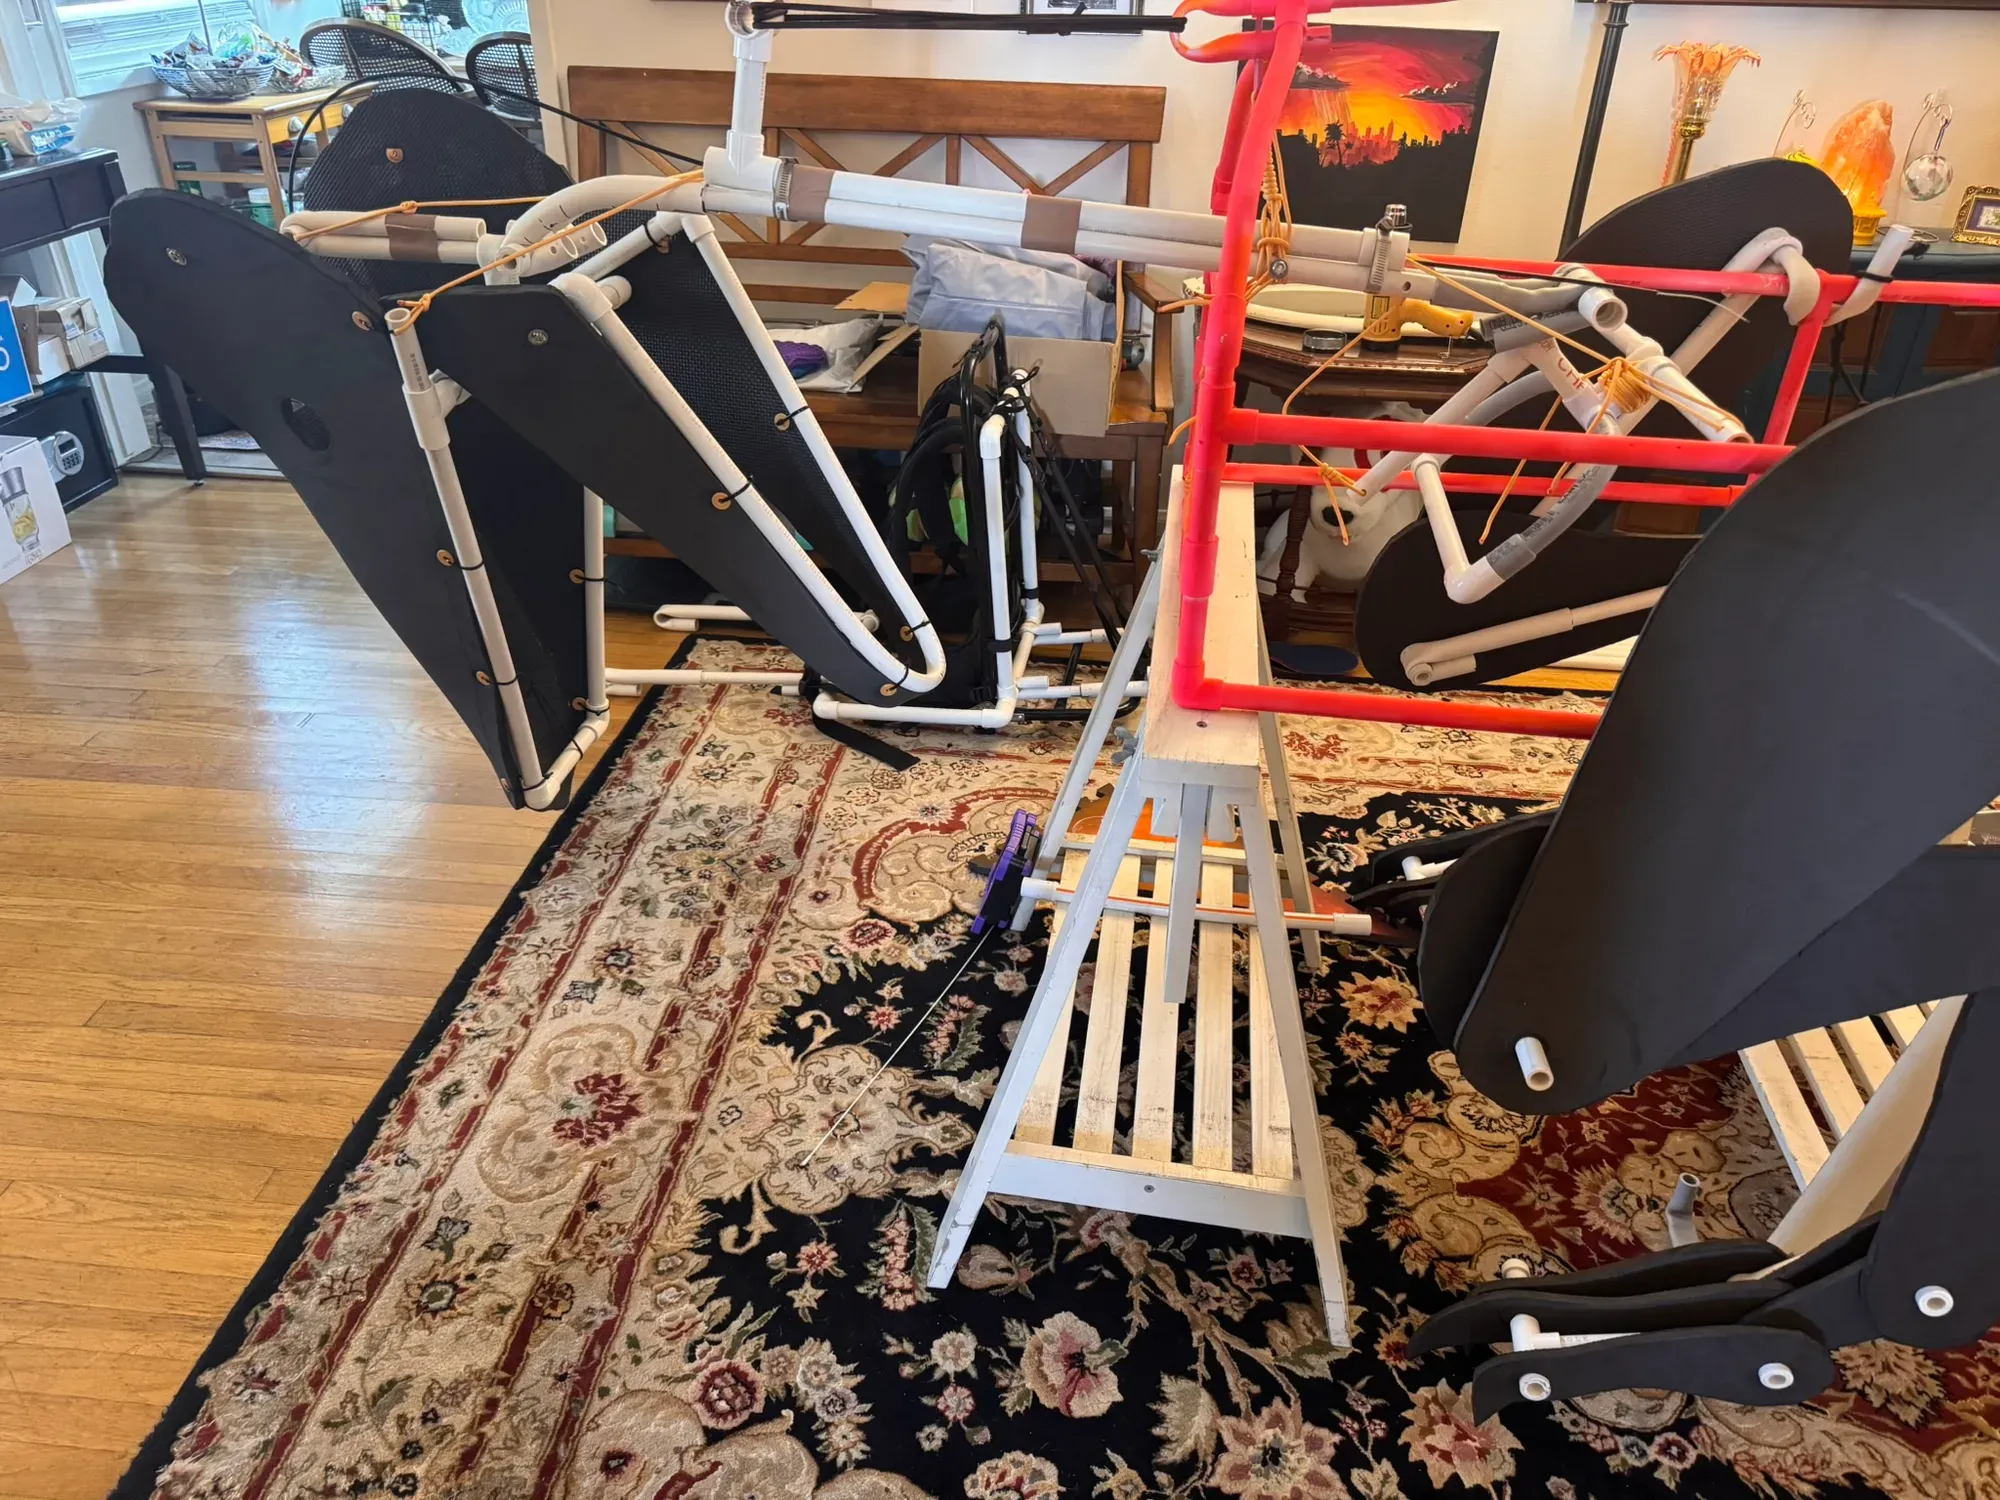
And the design question got answered. I generated concept art until something felt right, and the answer was always going to be pink and orange (more on that below). The first plate got paint the same morning, though that particular coat’s days were numbered.
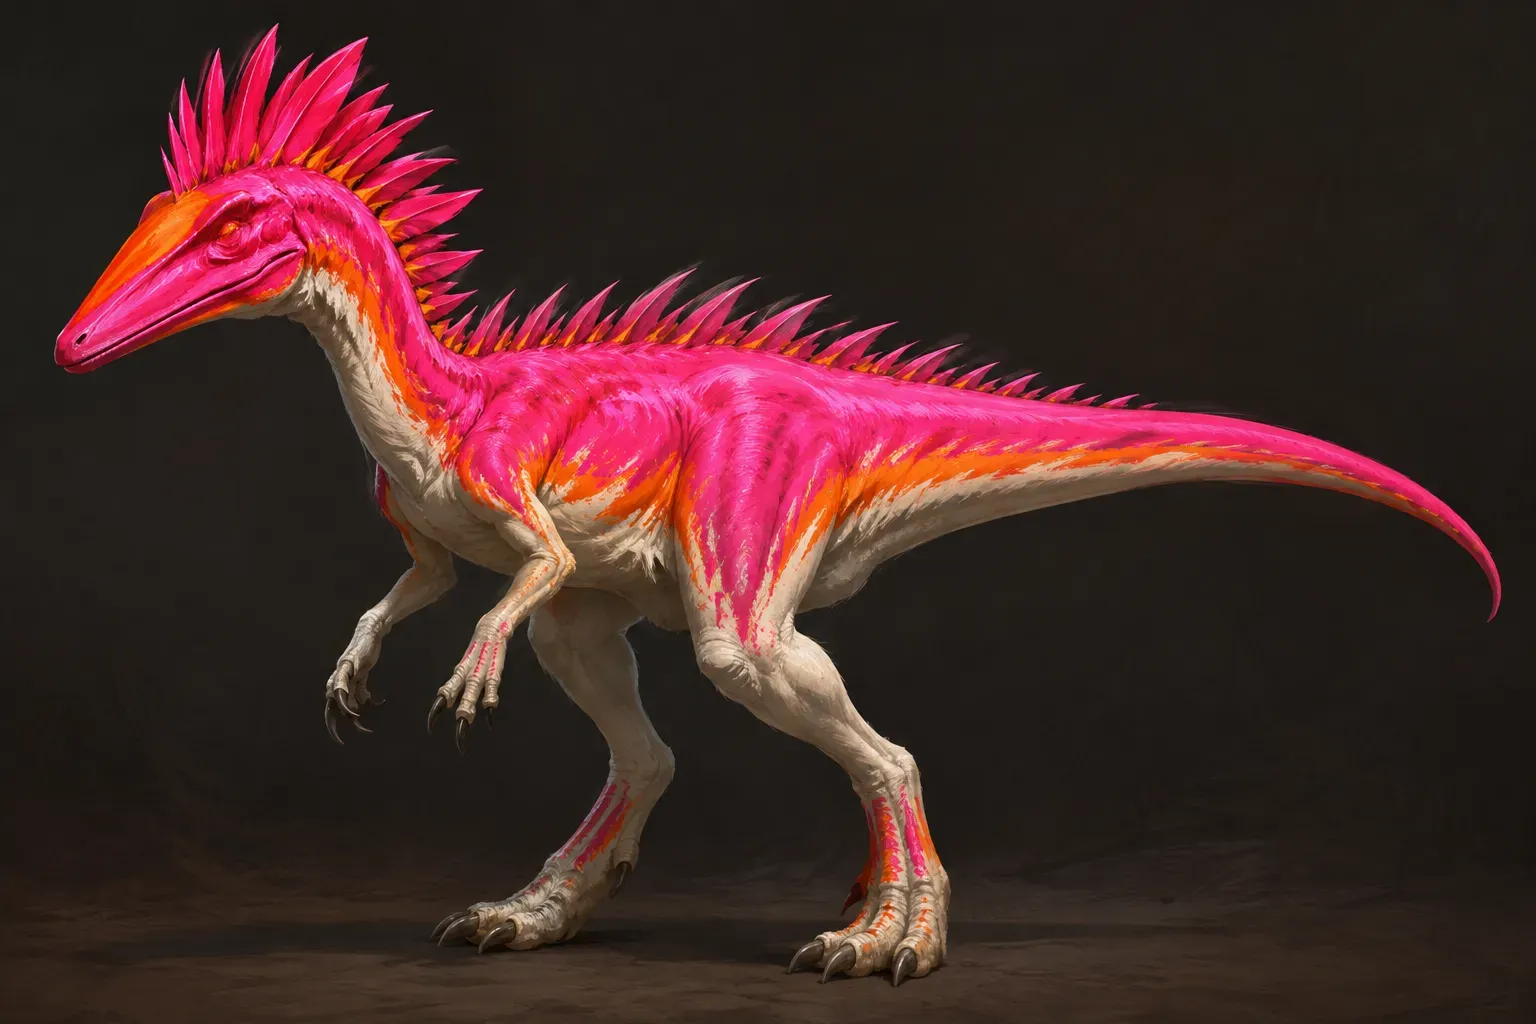
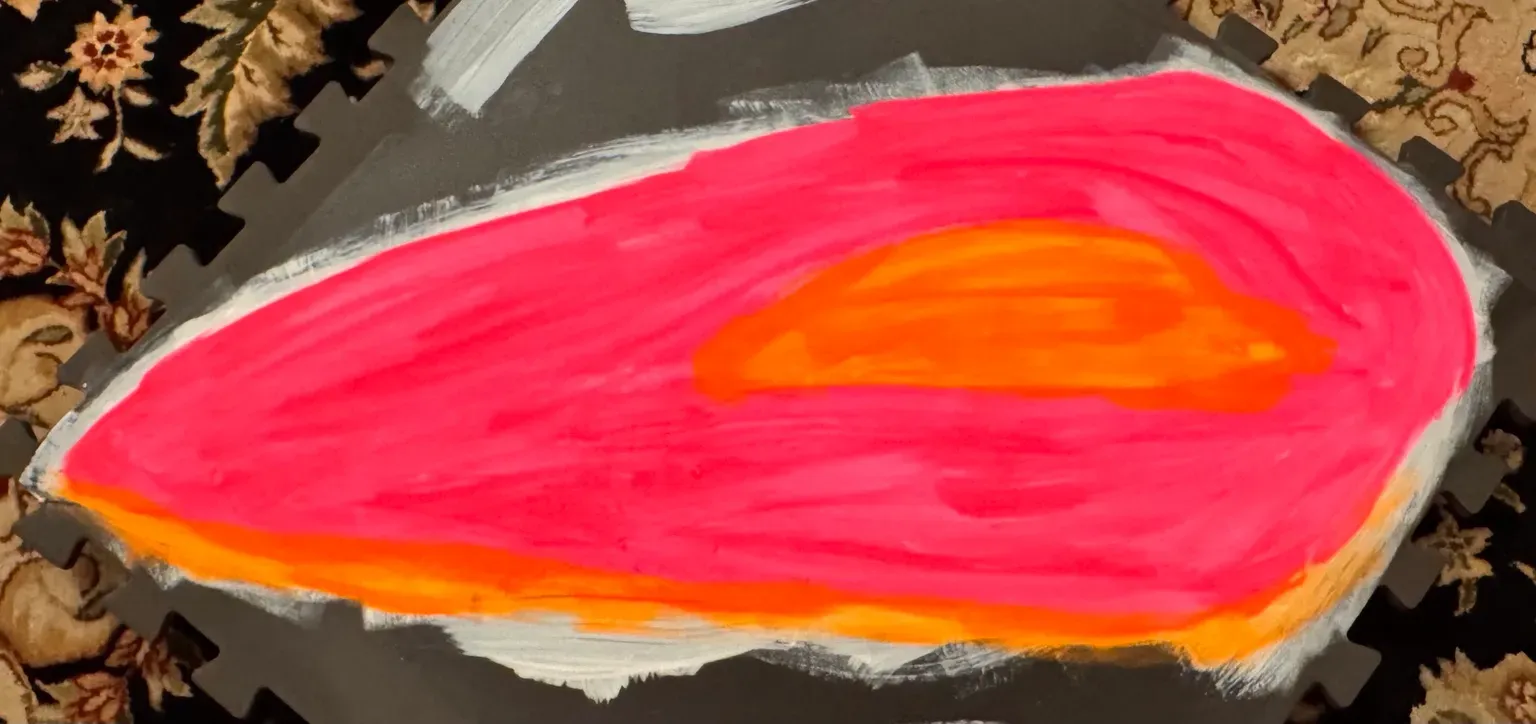
August 18. Paint by numbers, literally. I had concept art for the head and a list of the 24 paints actually on the shelf, so I wrote a posterizer that snaps the image to that exact palette and emits one stencil sheet per paint, plus a little browser tool for reassigning paints and tuning how many regions it’s allowed to use. (The teeth read as background until the white threshold came down. Tuning was most of the evening.)
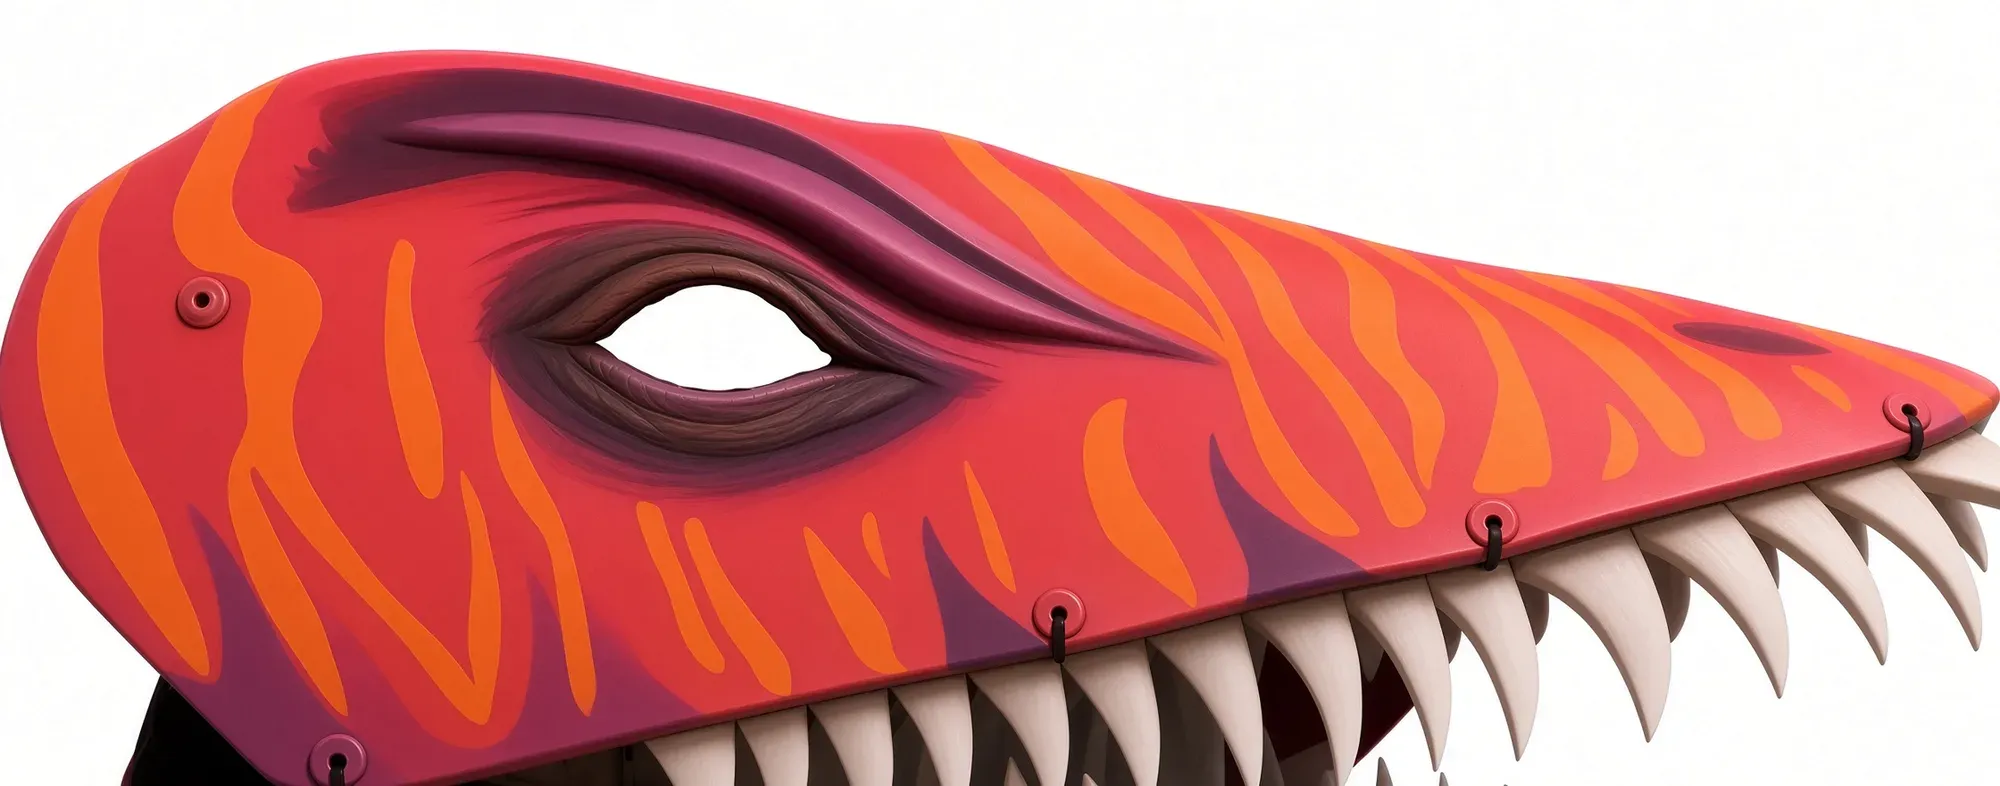
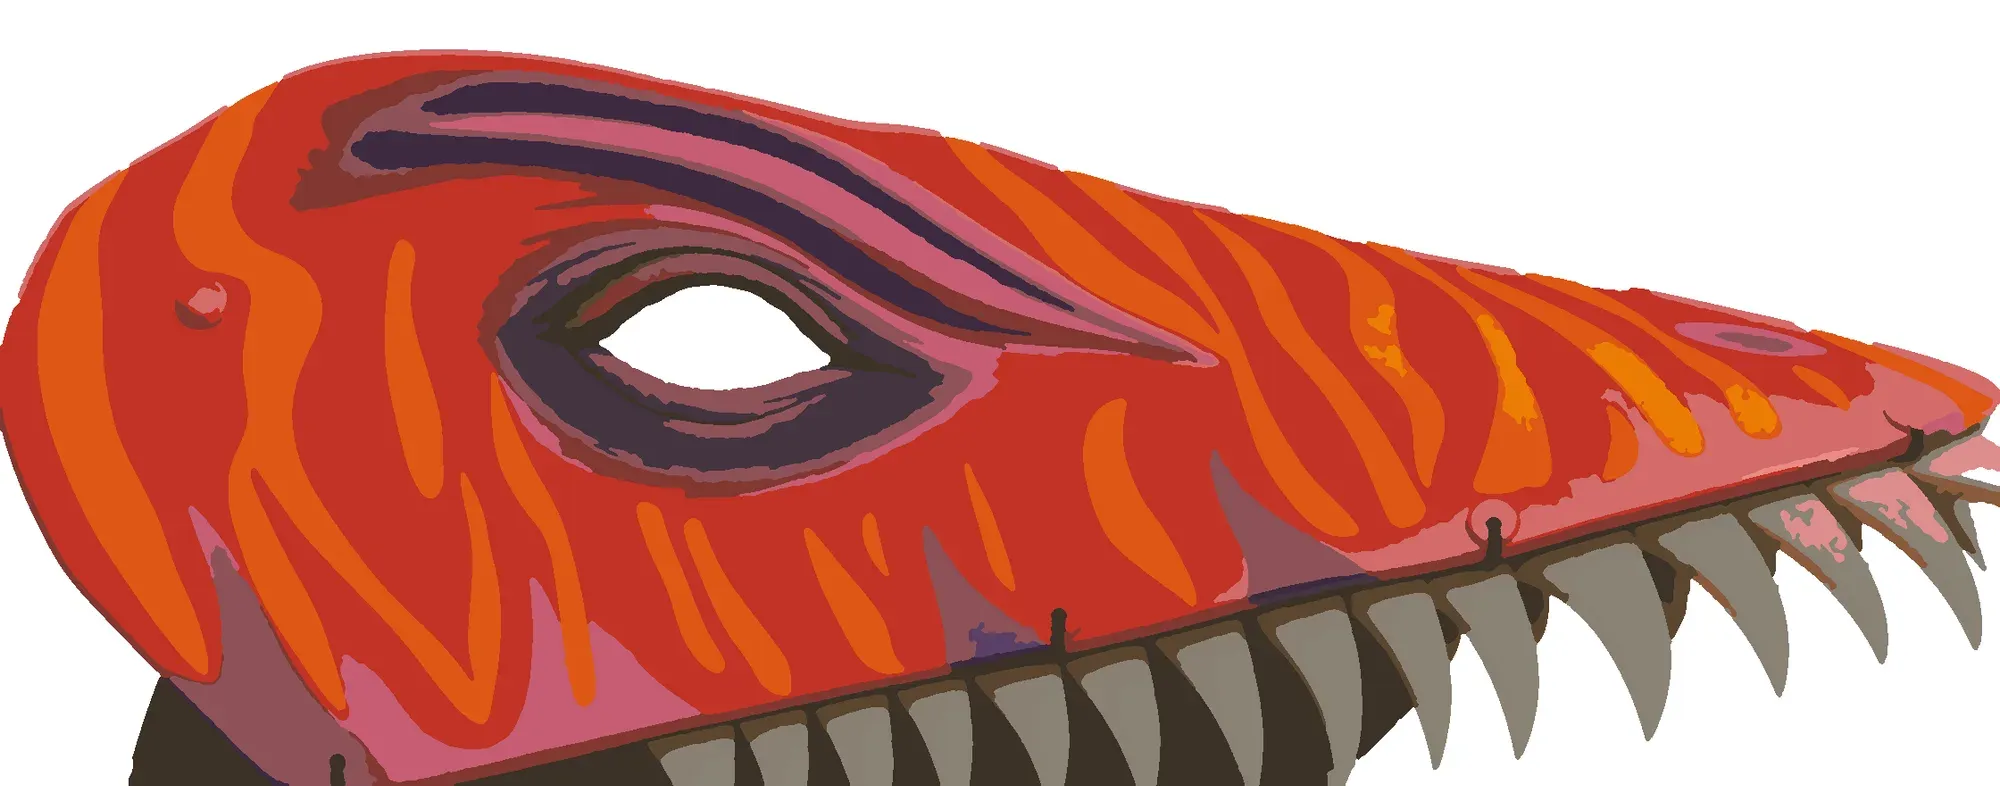
August 22. Finished. Every plate is on and painted, the teeth are in, and the eyes are a pair of concentric-ring LED arrays running WLED. I wrote led-eye-designer to do the eyes: a single-file web page that previews a blinking eye on the exact ring layout, lets me tune the stare time and lid speed, generates the ledmap.json, and installs the blink as WLED presets and a playlist so it runs on the controller with no computer attached. It mirrors to a second array on a second GPIO so both eyes blink in lockstep. The design that stuck is blue-violet with a movable pupil. This is the designer’s preview of it, sampled onto the real 61-LED layout:
The photo at the top of this page is the result.
The skin question
Between the frame and the paint sits the real open problem: what the skin should be. I generated concept sheets exploring what the same PVC skeleton could become with different foam treatments (a raptor, sure, but also a triceratops, a mosasaur, an owl beast, and a pelican, because concept art is cheap and commitment isn’t):
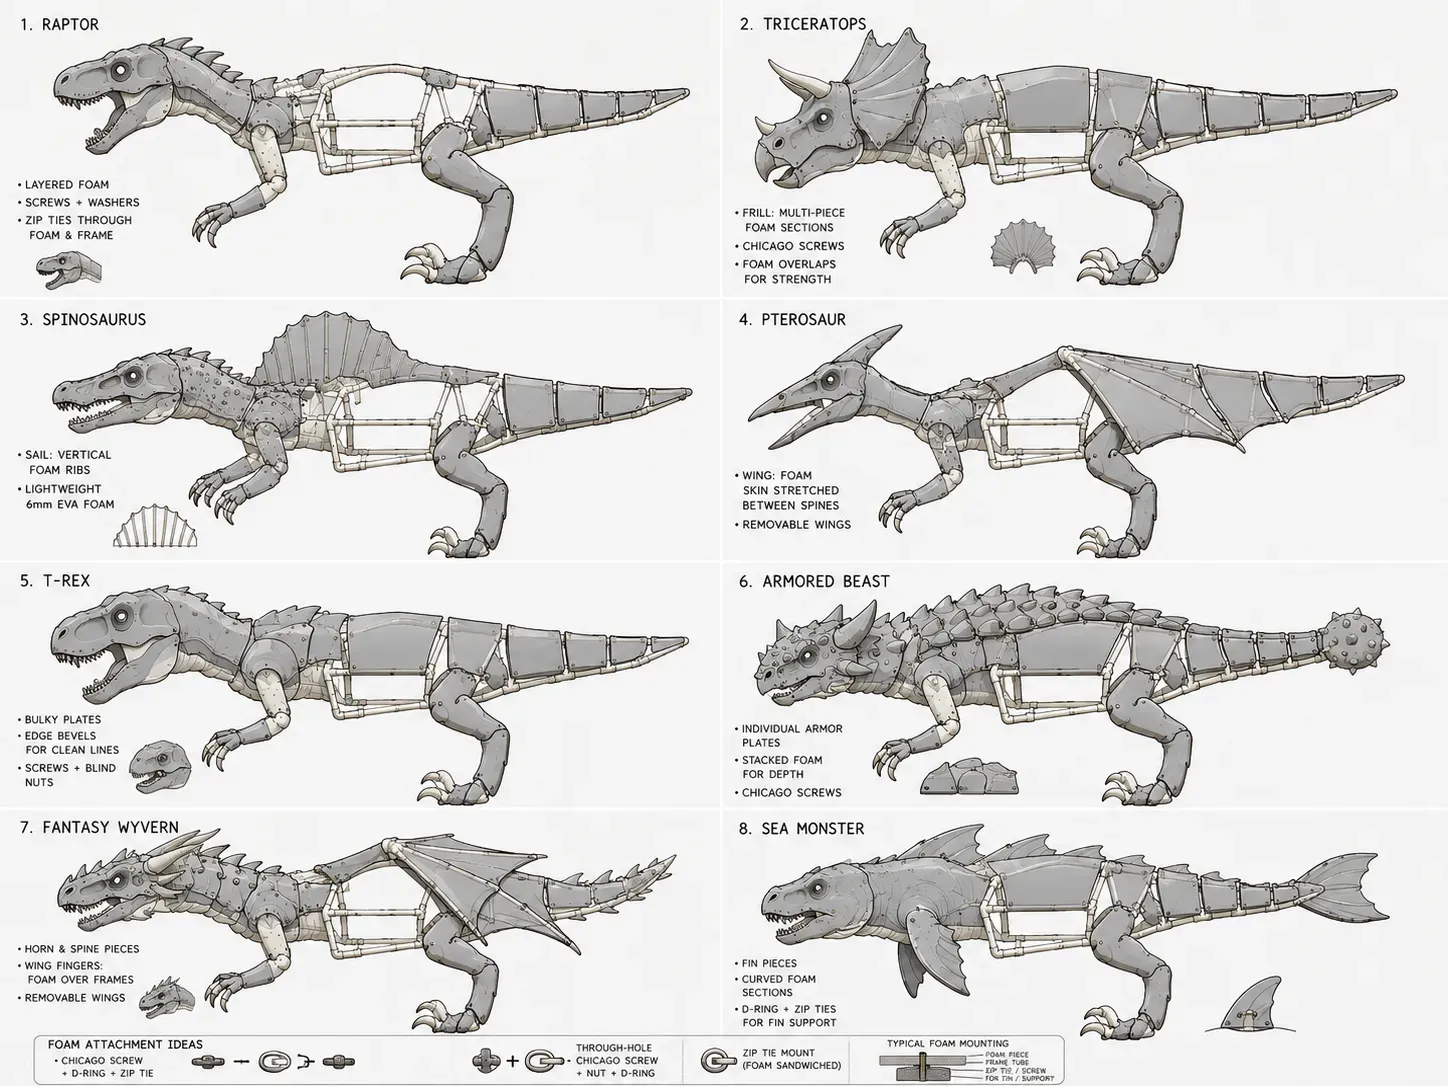
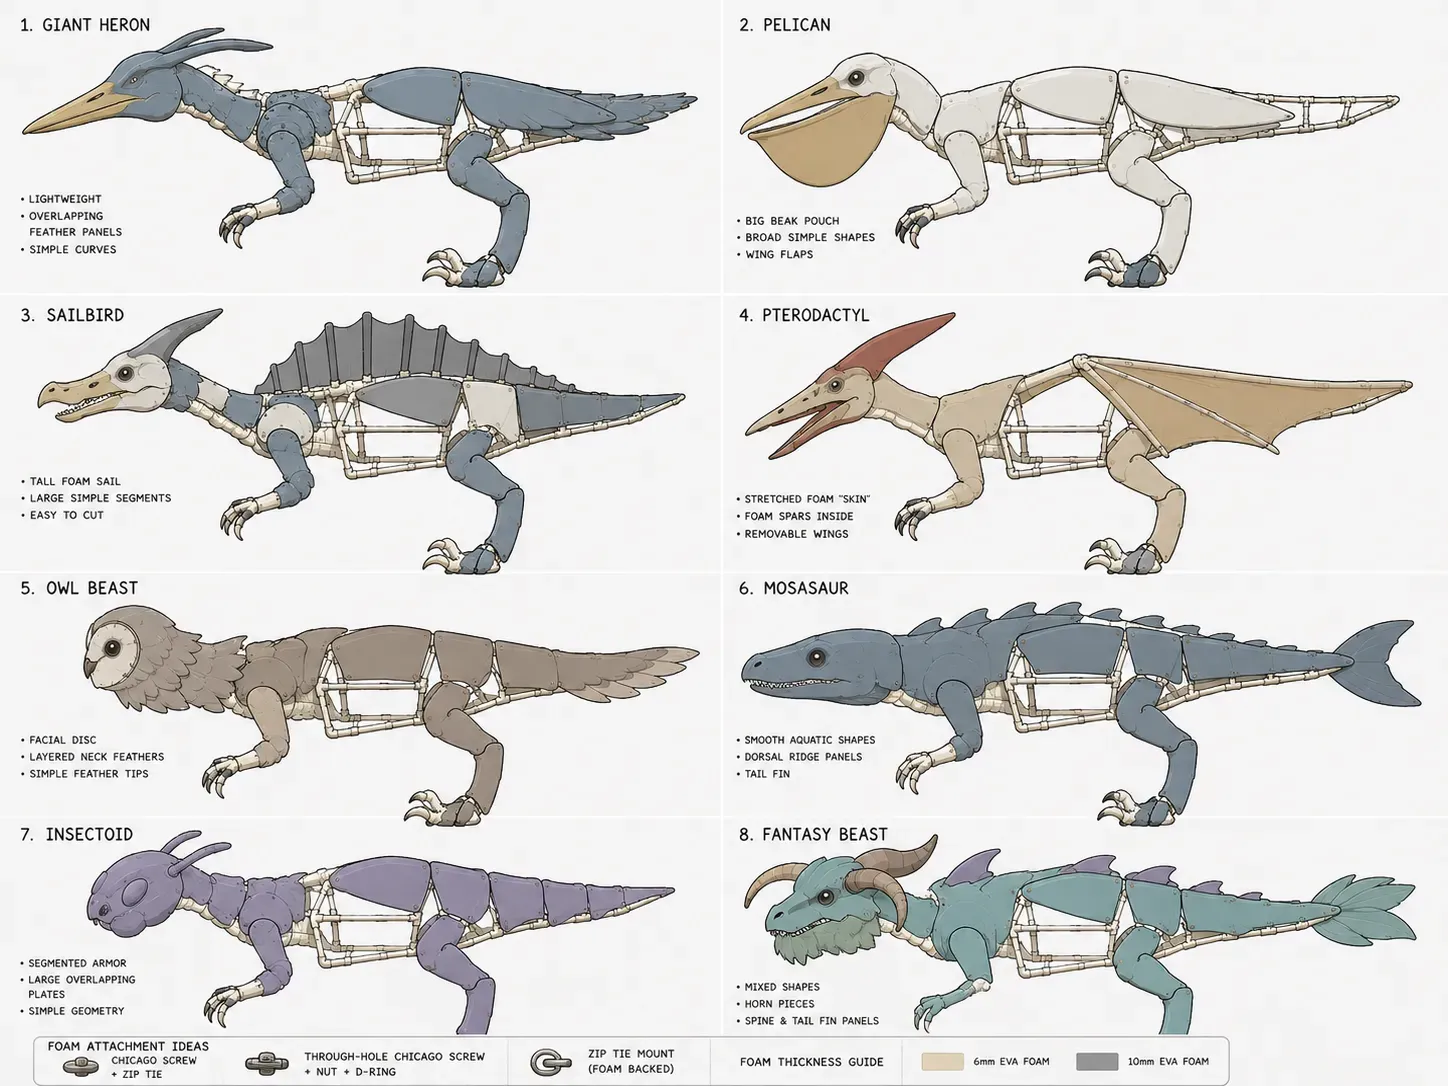
The working answer is layered EVA foam profiles (like the leg above), 6mm for shaping and 10mm where structure matters, plus thinner foam for ridges once it arrives. Attachment is where MOOP paranoia kicks in: the foam mounts with Ty-Rap zip ties, the kind with the stainless steel locking barb, because a nylon-pawl zip tie that bakes in the desert sun and lets go turns a body plate into tumbleweed.
For clean pass-throughs where a tie or cord runs through foam, I designed two-part printed through-hulls in vibecad: a washered inner tube that seats through the sheet and an outer sleeve that locks over it, in threaded and push-on fir-tree variants.
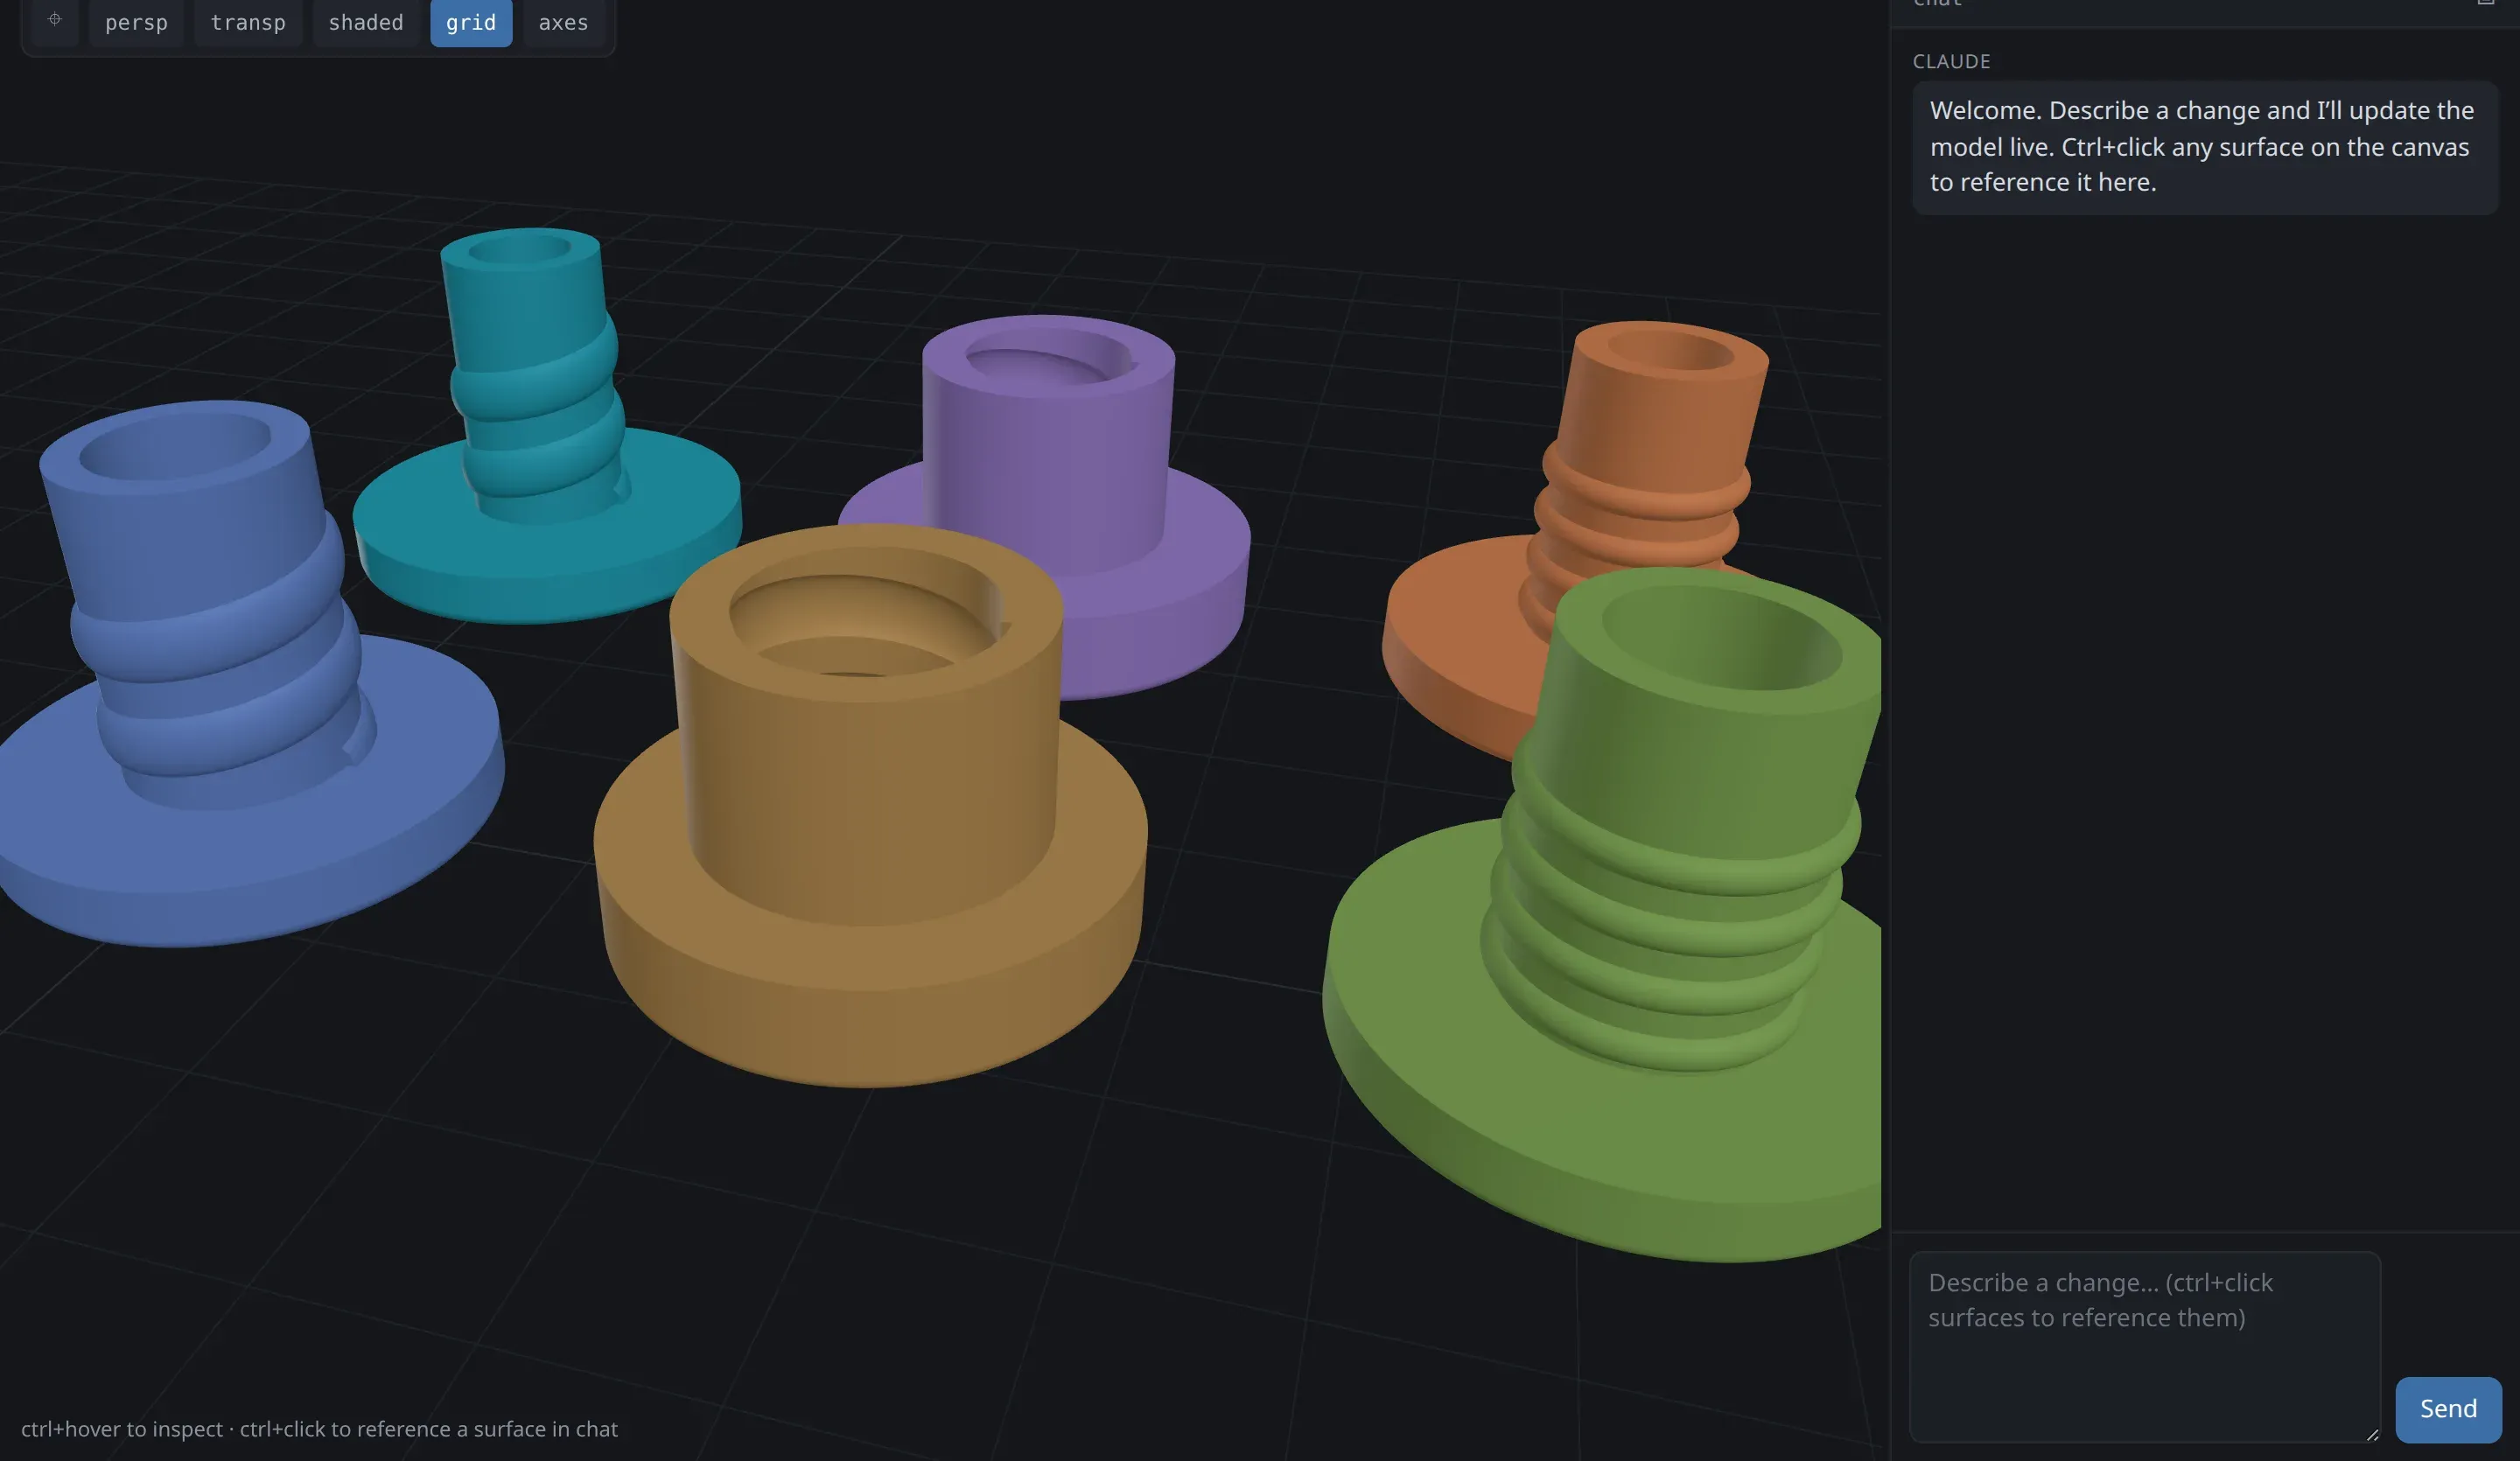
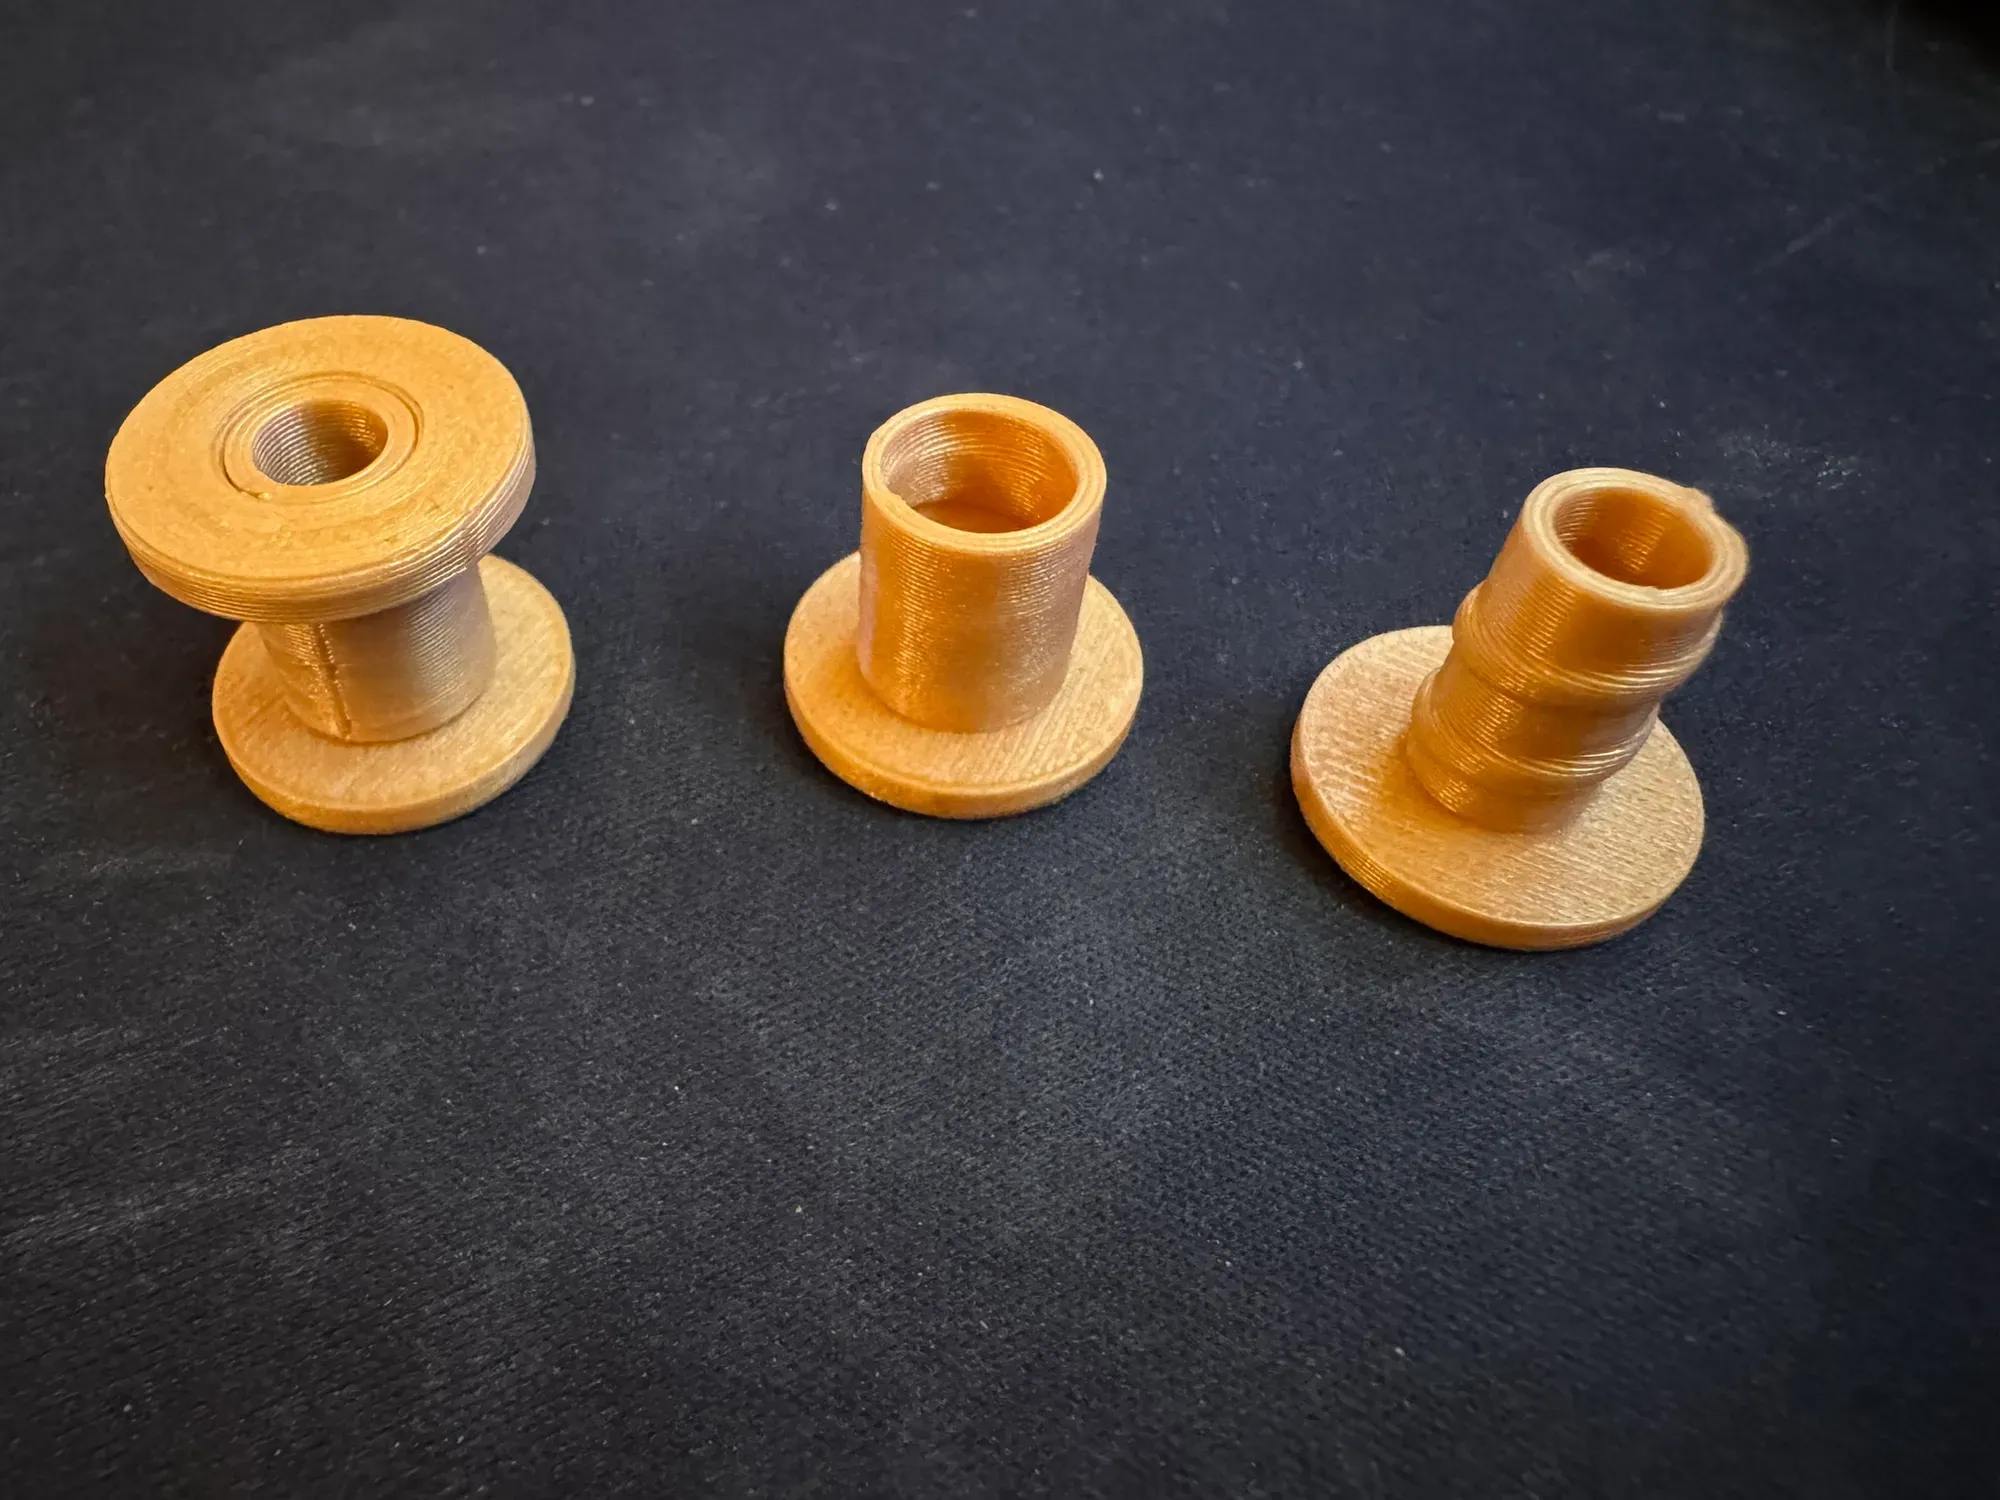
The pornj raptor-alike won the concept sheet, but the owl beast haunts me a little.
The color is pornj
I’m camping with Disorient, and Disorient has an official color: pornj, which their wiki defines as “a bright happy color halfway between Pink and Orange, diminishing neither.” Fluorescent pink plus fluorescent orange (Pantone 806 and 804, for those keeping score), coined in 2004 during a build session for the original Disorient sign. So the raptor isn’t pink because I like pink, though I do. The dinosaur has a camp uniform.
My first paint pass didn’t survive contact with judgment: too moopy. Paint that doesn’t bond properly flakes, and flakes on the playa become MOOP (Matter Out of Place), the one souvenir you’re required not to leave. So that coat is coming off: sand the frame until painter’s tape lifts nothing, scuff, reprime, and do it right.
The proper stack (arrived at after a long argument with ChatGPT about paint chemistry) is actually two stacks. The EVA foam gets heat-sealed, flexible-primed (Rosco FlexBond), based in white, brushed with fluorescent acrylics in 2 to 4 thin coats (fluorescents are translucent, so white underneath or you’re painting seventeen coats onto a dirty-looking dinosaur), and clear-coated with something that stays flexible.
The PVC frame gets scuffed, plastic-primed, and painted with plastic-bonding paint, with the fluorescent areas primed white and finished in blacklight-reactive neon plus a flexible gloss clear.
The blacklight-reactive part matters: Burning Man at night is a UV environment (and I have UV lights I’ll be carrying), and the creature should glow like it belongs there. Everything ends with a tape test, because a clear coat over loose paint just converts small flakes into larger, more efficient flakes.
That stack is what’s on the creature now, and the stripes came out of the stencil sheets above.
What it cost
I mined my order history so you don’t have to wonder. About $1,300 so far: roughly $1,100 through Amazon since early July, plus about $200 at Home Depot for the pipe and cement themselves.
- Structure$535 41%
- Paint$270 21%
- Skin$195 15%
- Tools$185 14%
- Lights and rigging$110 8%
Where it went, roughly:
- Structure: ~$535. The aluminum pack frame ($98, the single most expensive item), a small mountain of furniture-grade fittings, snap-on saddles, fiberglass rods, and the Home Depot pipe run.
- Paint, both stacks: ~$270. The fluorescent acrylics, primers, varnishes, brushes, and rollers, including the first stack that’s now getting sanded off. Tuition.
- Skin: ~$195. Half-inch puzzle mats (the 10mm body foam), 2mm sheets for ridges, foam clay, contact cement, foam glue, and the M6 hardware that holds it all on.
- Tools: ~$185. Two foam cutters (hot knife and hot wire), a pipe cutter, a heat gun, punches, and drill bits. These survive the project.
- Lights and rigging: ~$110. COB strips, the boost converter, bungee by the hundred feet, paracord, and the brake cable.
For a creature vocabulary built on “cheap pipe and rope,” well, the pipe and rope were in fact cheap. It’s everything that touches them that adds up.
August 23 note: it ended up being another couple hundred dollars…
The Doloresaurus moment
Somewhere in all this I discovered that Doloresaurus exists: Trevor Mead built a magnificent dinosaur (its official bio involves disco, house music, and running from children), and it already goes to Burning Man. I had a brief, genuine moment of despair. Partly the deflating feeling that my version is less cool, and partly the worry that people would think I ripped off someone’s idea.
Then I realized how ridiculous that was. Nobody owns “dinosaur at Burning Man.” Two home-built dinosaurs on the same playa isn’t a controversy, it’s a genre. Better: it’s an army. Doloresaurus lives in Esmee Kramer’s dino army gallery, where she shows off builds her Project Raptor inspired and openly recruits new ones. Mine descends directly from hers, so once it’s finished I’m reaching out to enlist.
Meanwhile I reached out to Trevor on Instagram for tips, because the man clearly knows things about keeping a dinosaur alive in the desert that I’m about to learn the hard way. He’s been super helpful and encouraging.
What’s next
The playa. It needs a name before it gets there, and it needs to survive dust, heat, and enthusiasm once it does. After that: the promised measurements and linkage closeups, and enlisting in the dino army.